The details…sort of…
OK, so I’ve had a little time to work on this due to two surgery’s within a month. With that downtime, and a little before, I’ve got this project as complete as I can get it for now. Yes, that means the door unit is not even mounted on the coop. Due to my surgeries, I am not supposed to lift anything heavier than a milk jug/~5lbs.
So here are the files in a generic form. Change a few things that are commented for you to change and you’ll be up and running.
*******Warning – I will not help you out any further than giving you these files. I just don’t have time. This is the best I can do – hours of me figuring it out on my own. The code is ugly and needs cleaning up – I am sure there is a more efficient way to do this, but I wanted to share it now. Good luck. **************
The files include: (CLICK ABOVE ON “KadensAutomatedCoop” to download the files)
- SQL file (Arduino_test.sql) for creating the tables in the database you create – MySQL
- PHP files (connect.php, index.php, and ardpost.php)
- connect.php will connect to your DB and the other pages use it to connect
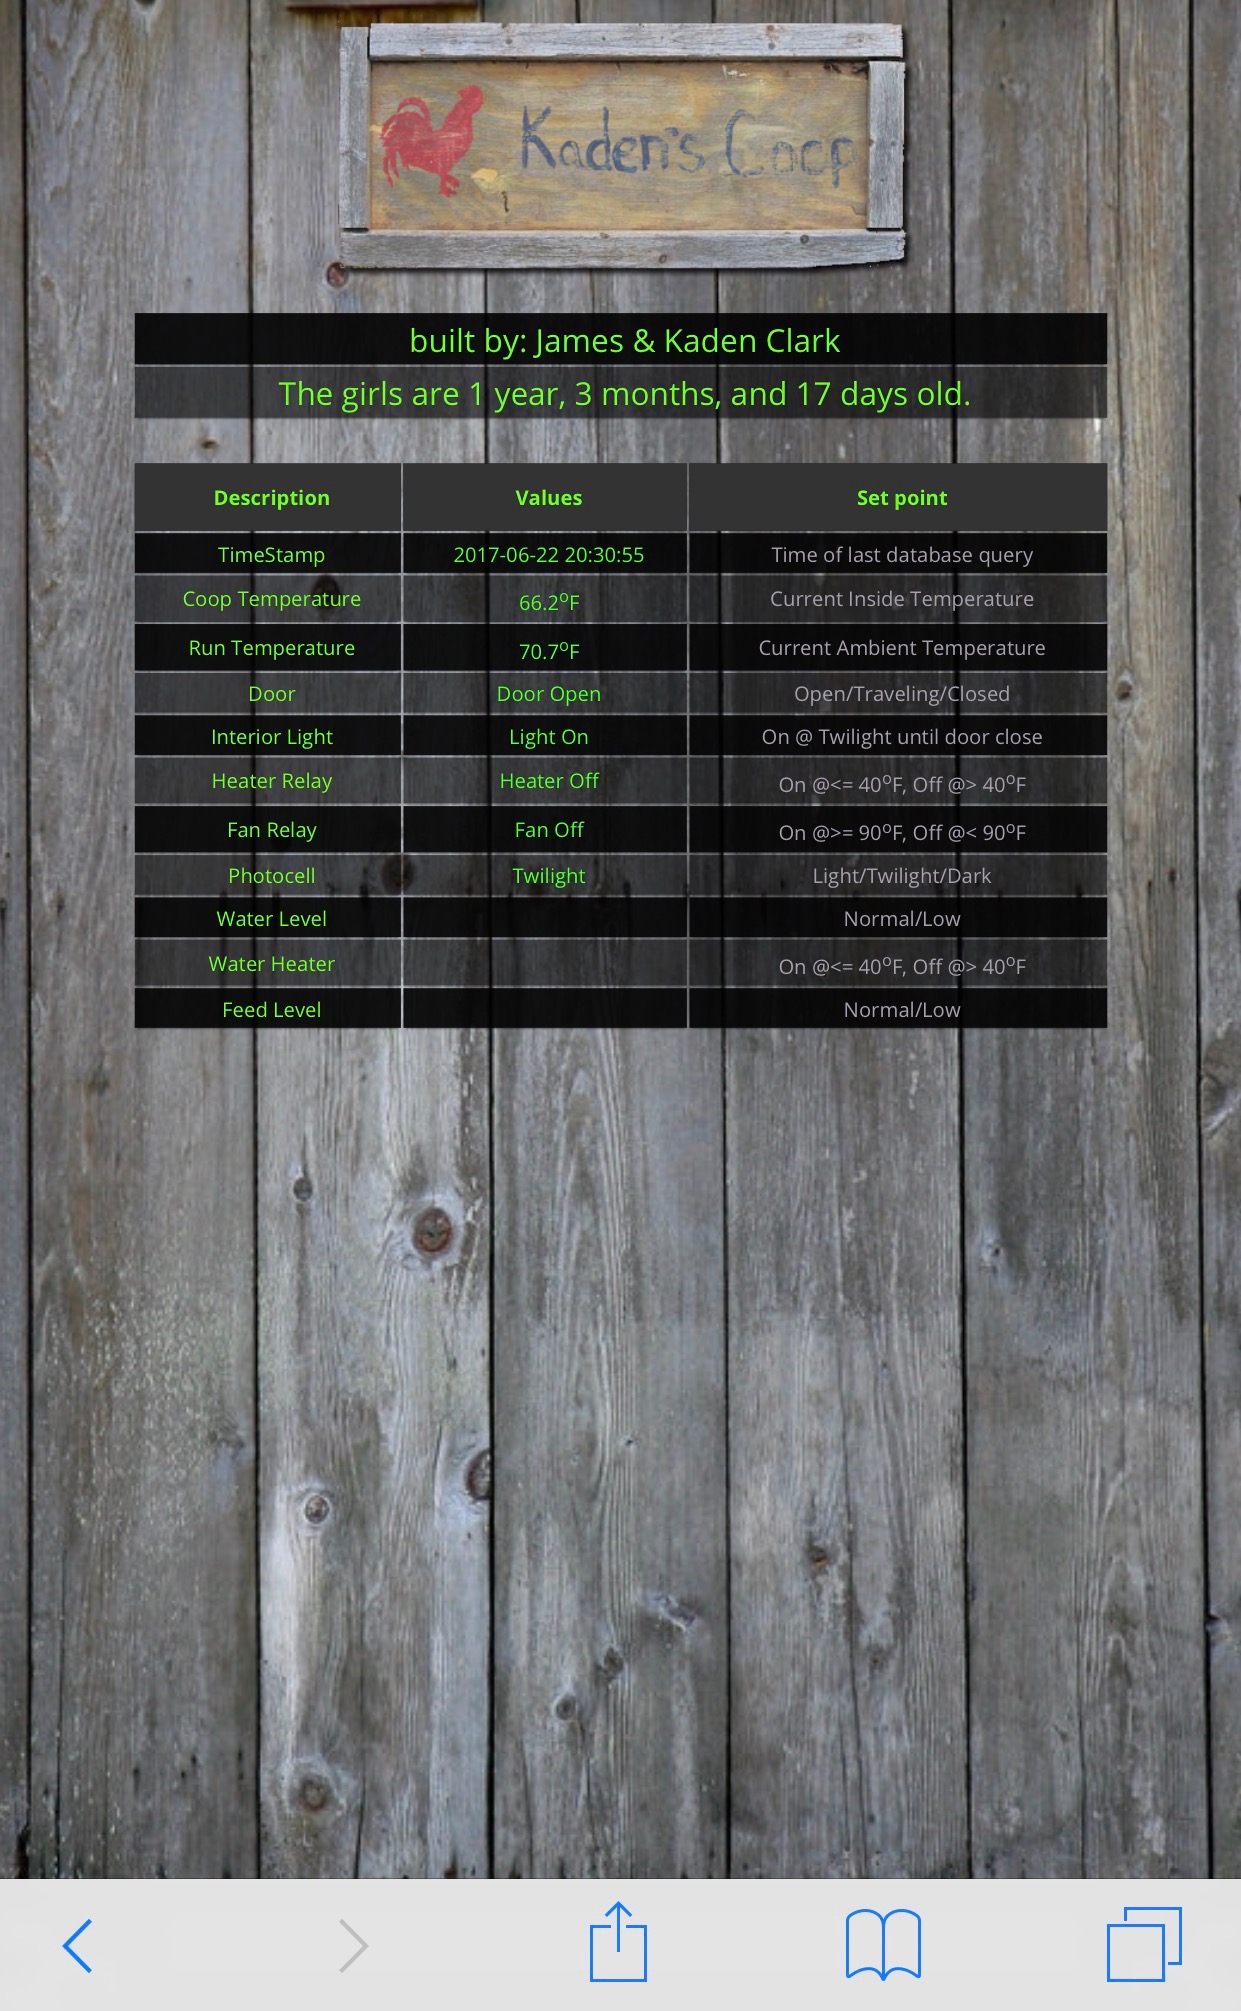
- index.php will display your information in a clean and simple way
- ardpost.php will insert the data from your Arduino into the DB
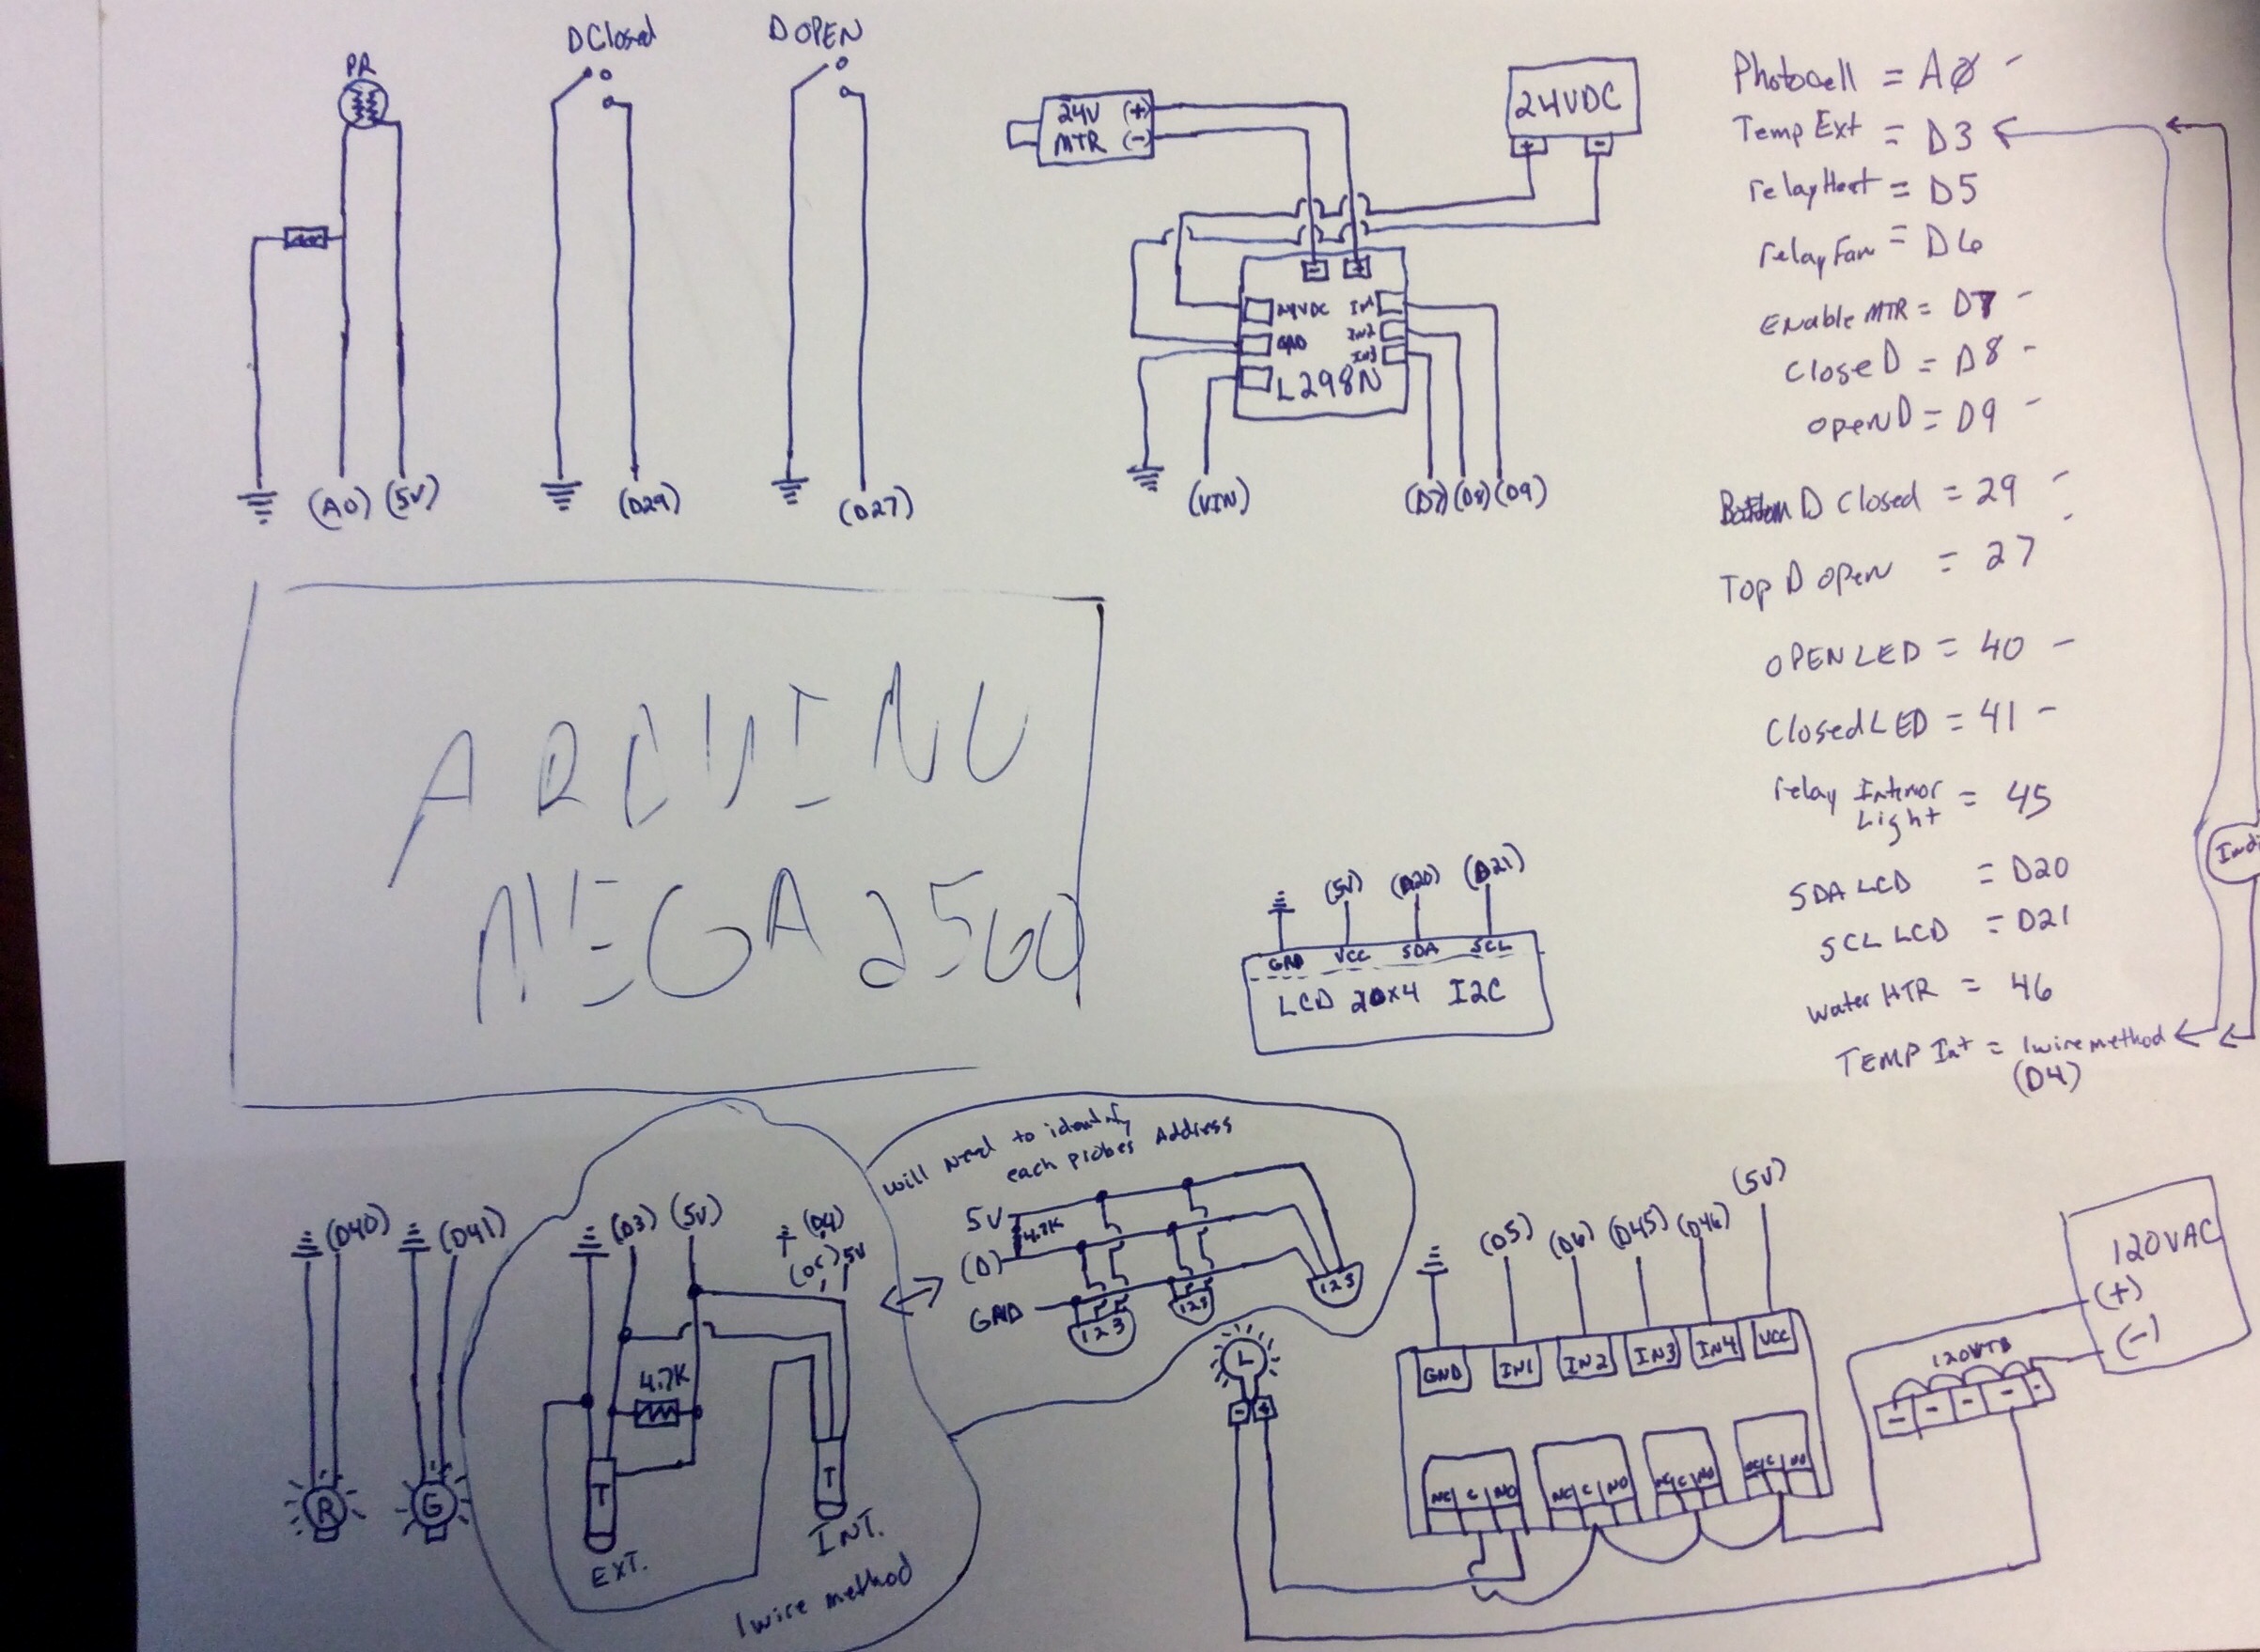
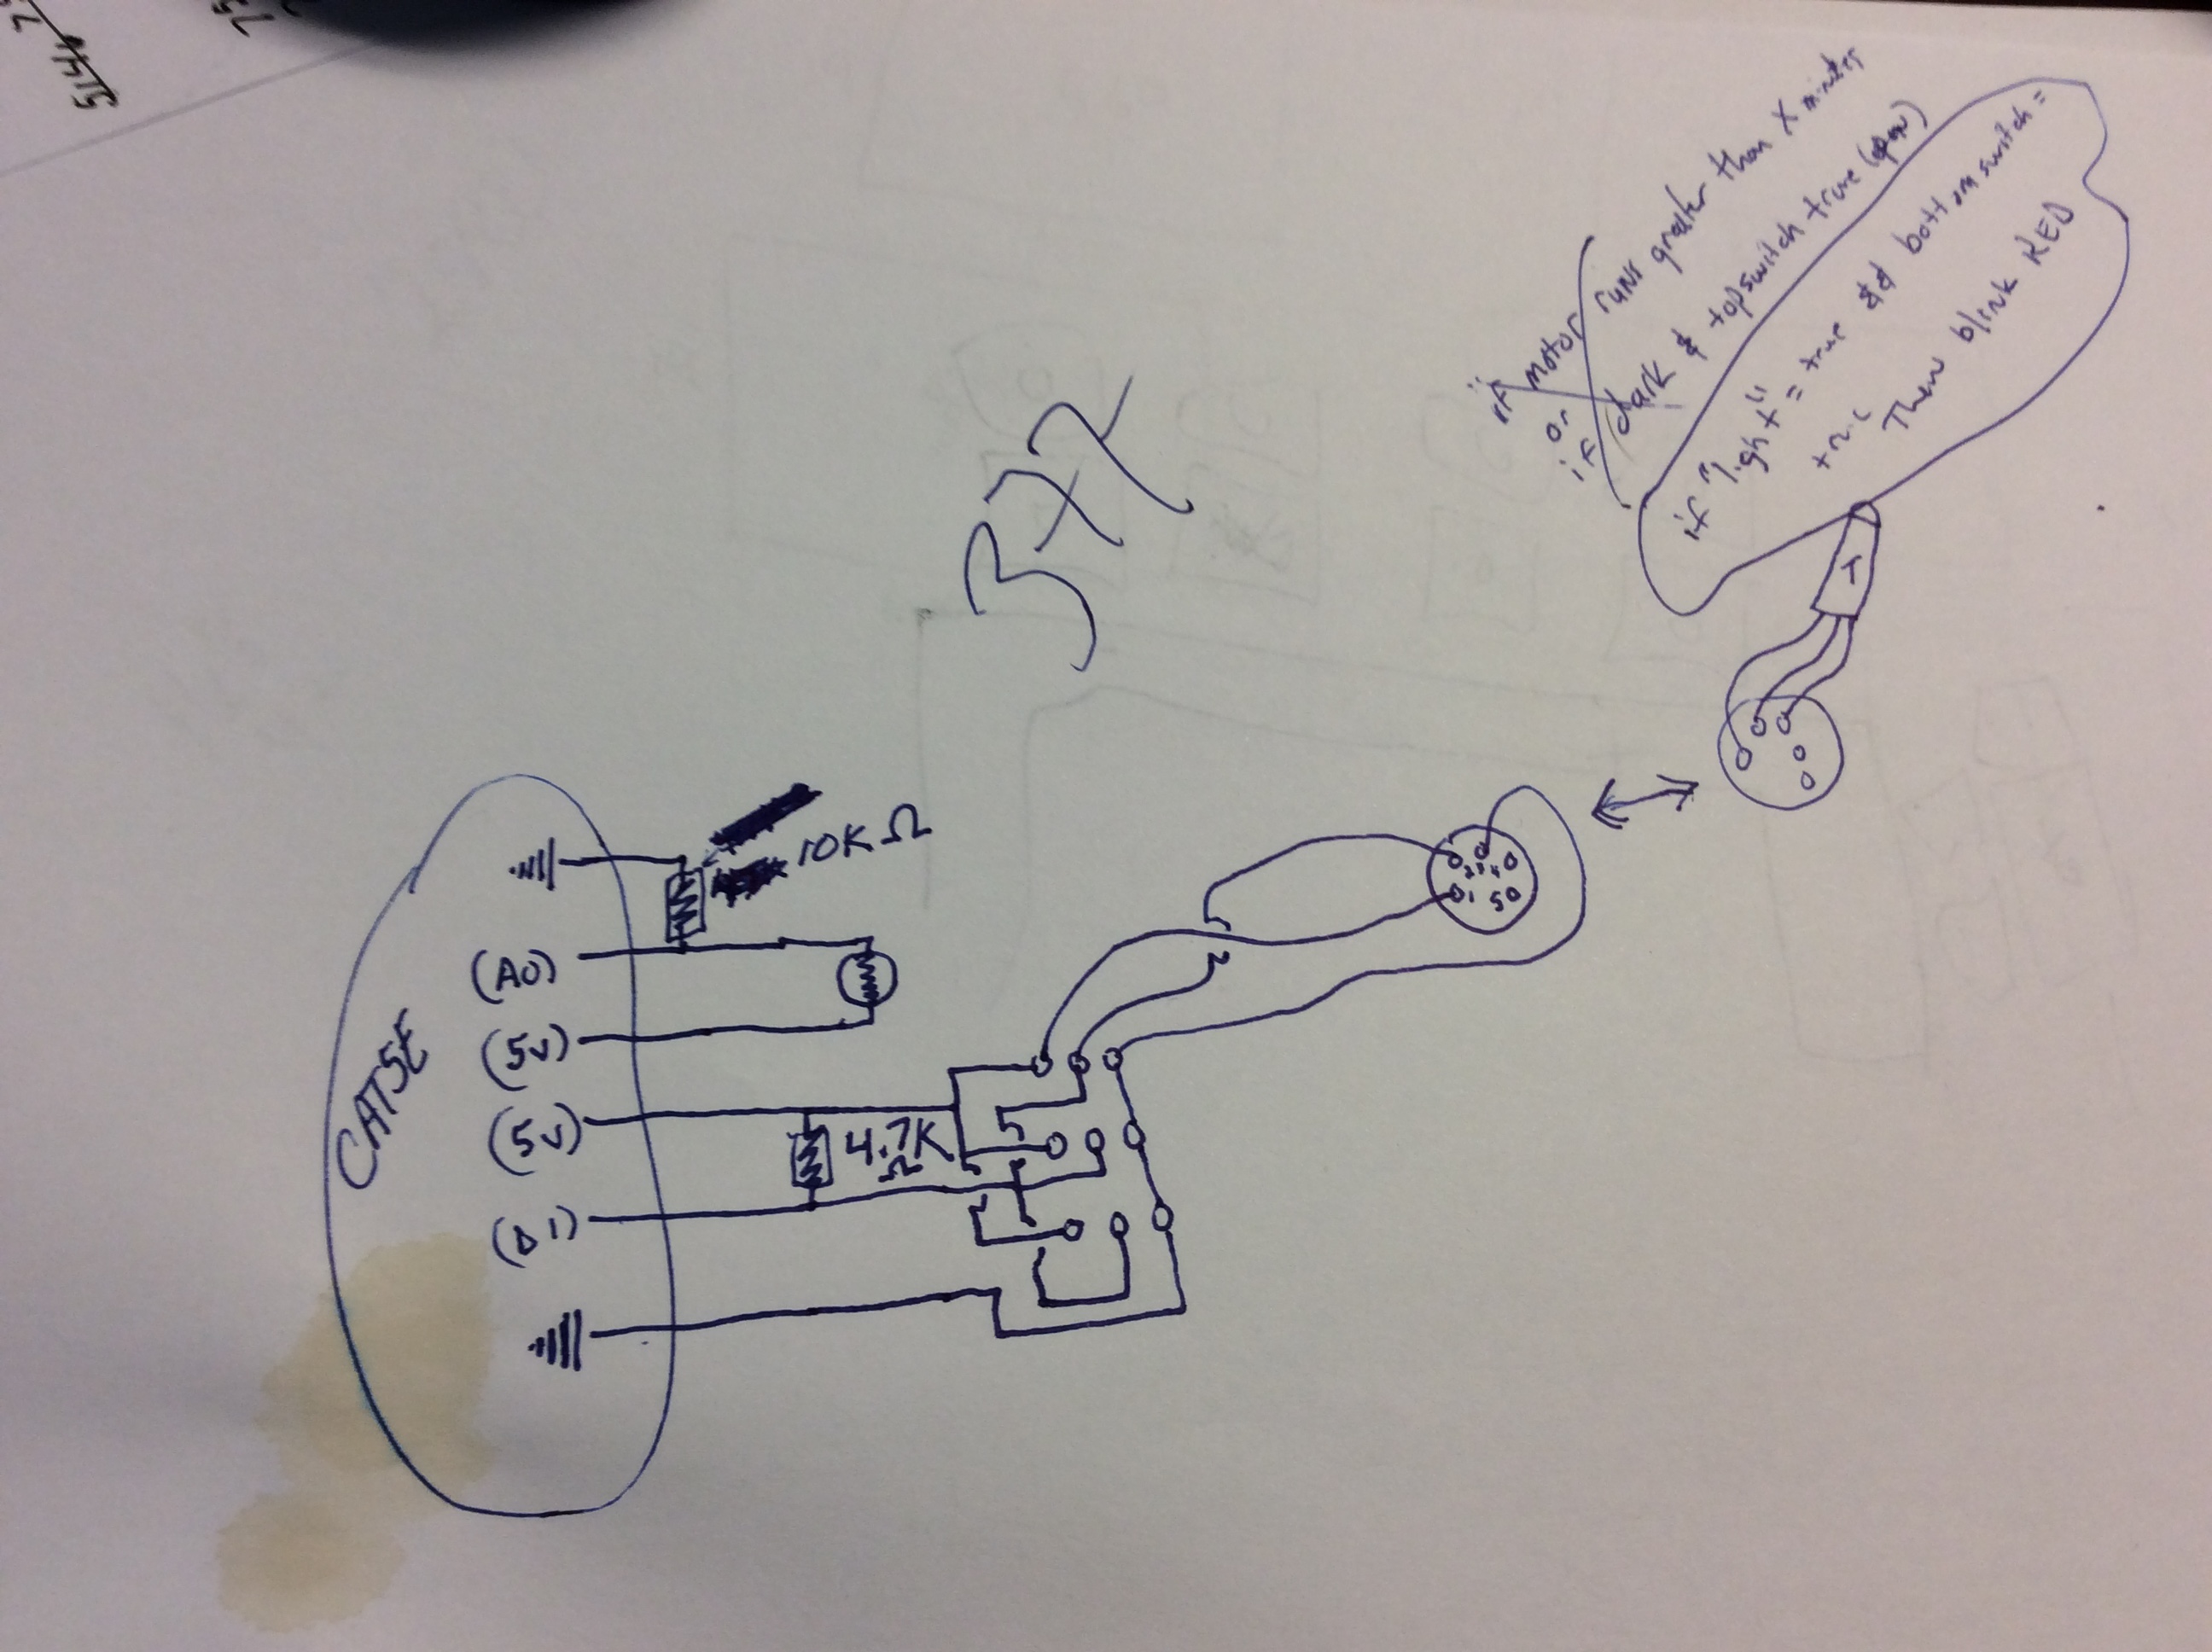
- K_A_C_2.0.ino (Arduino file) this is the Arduino sketch
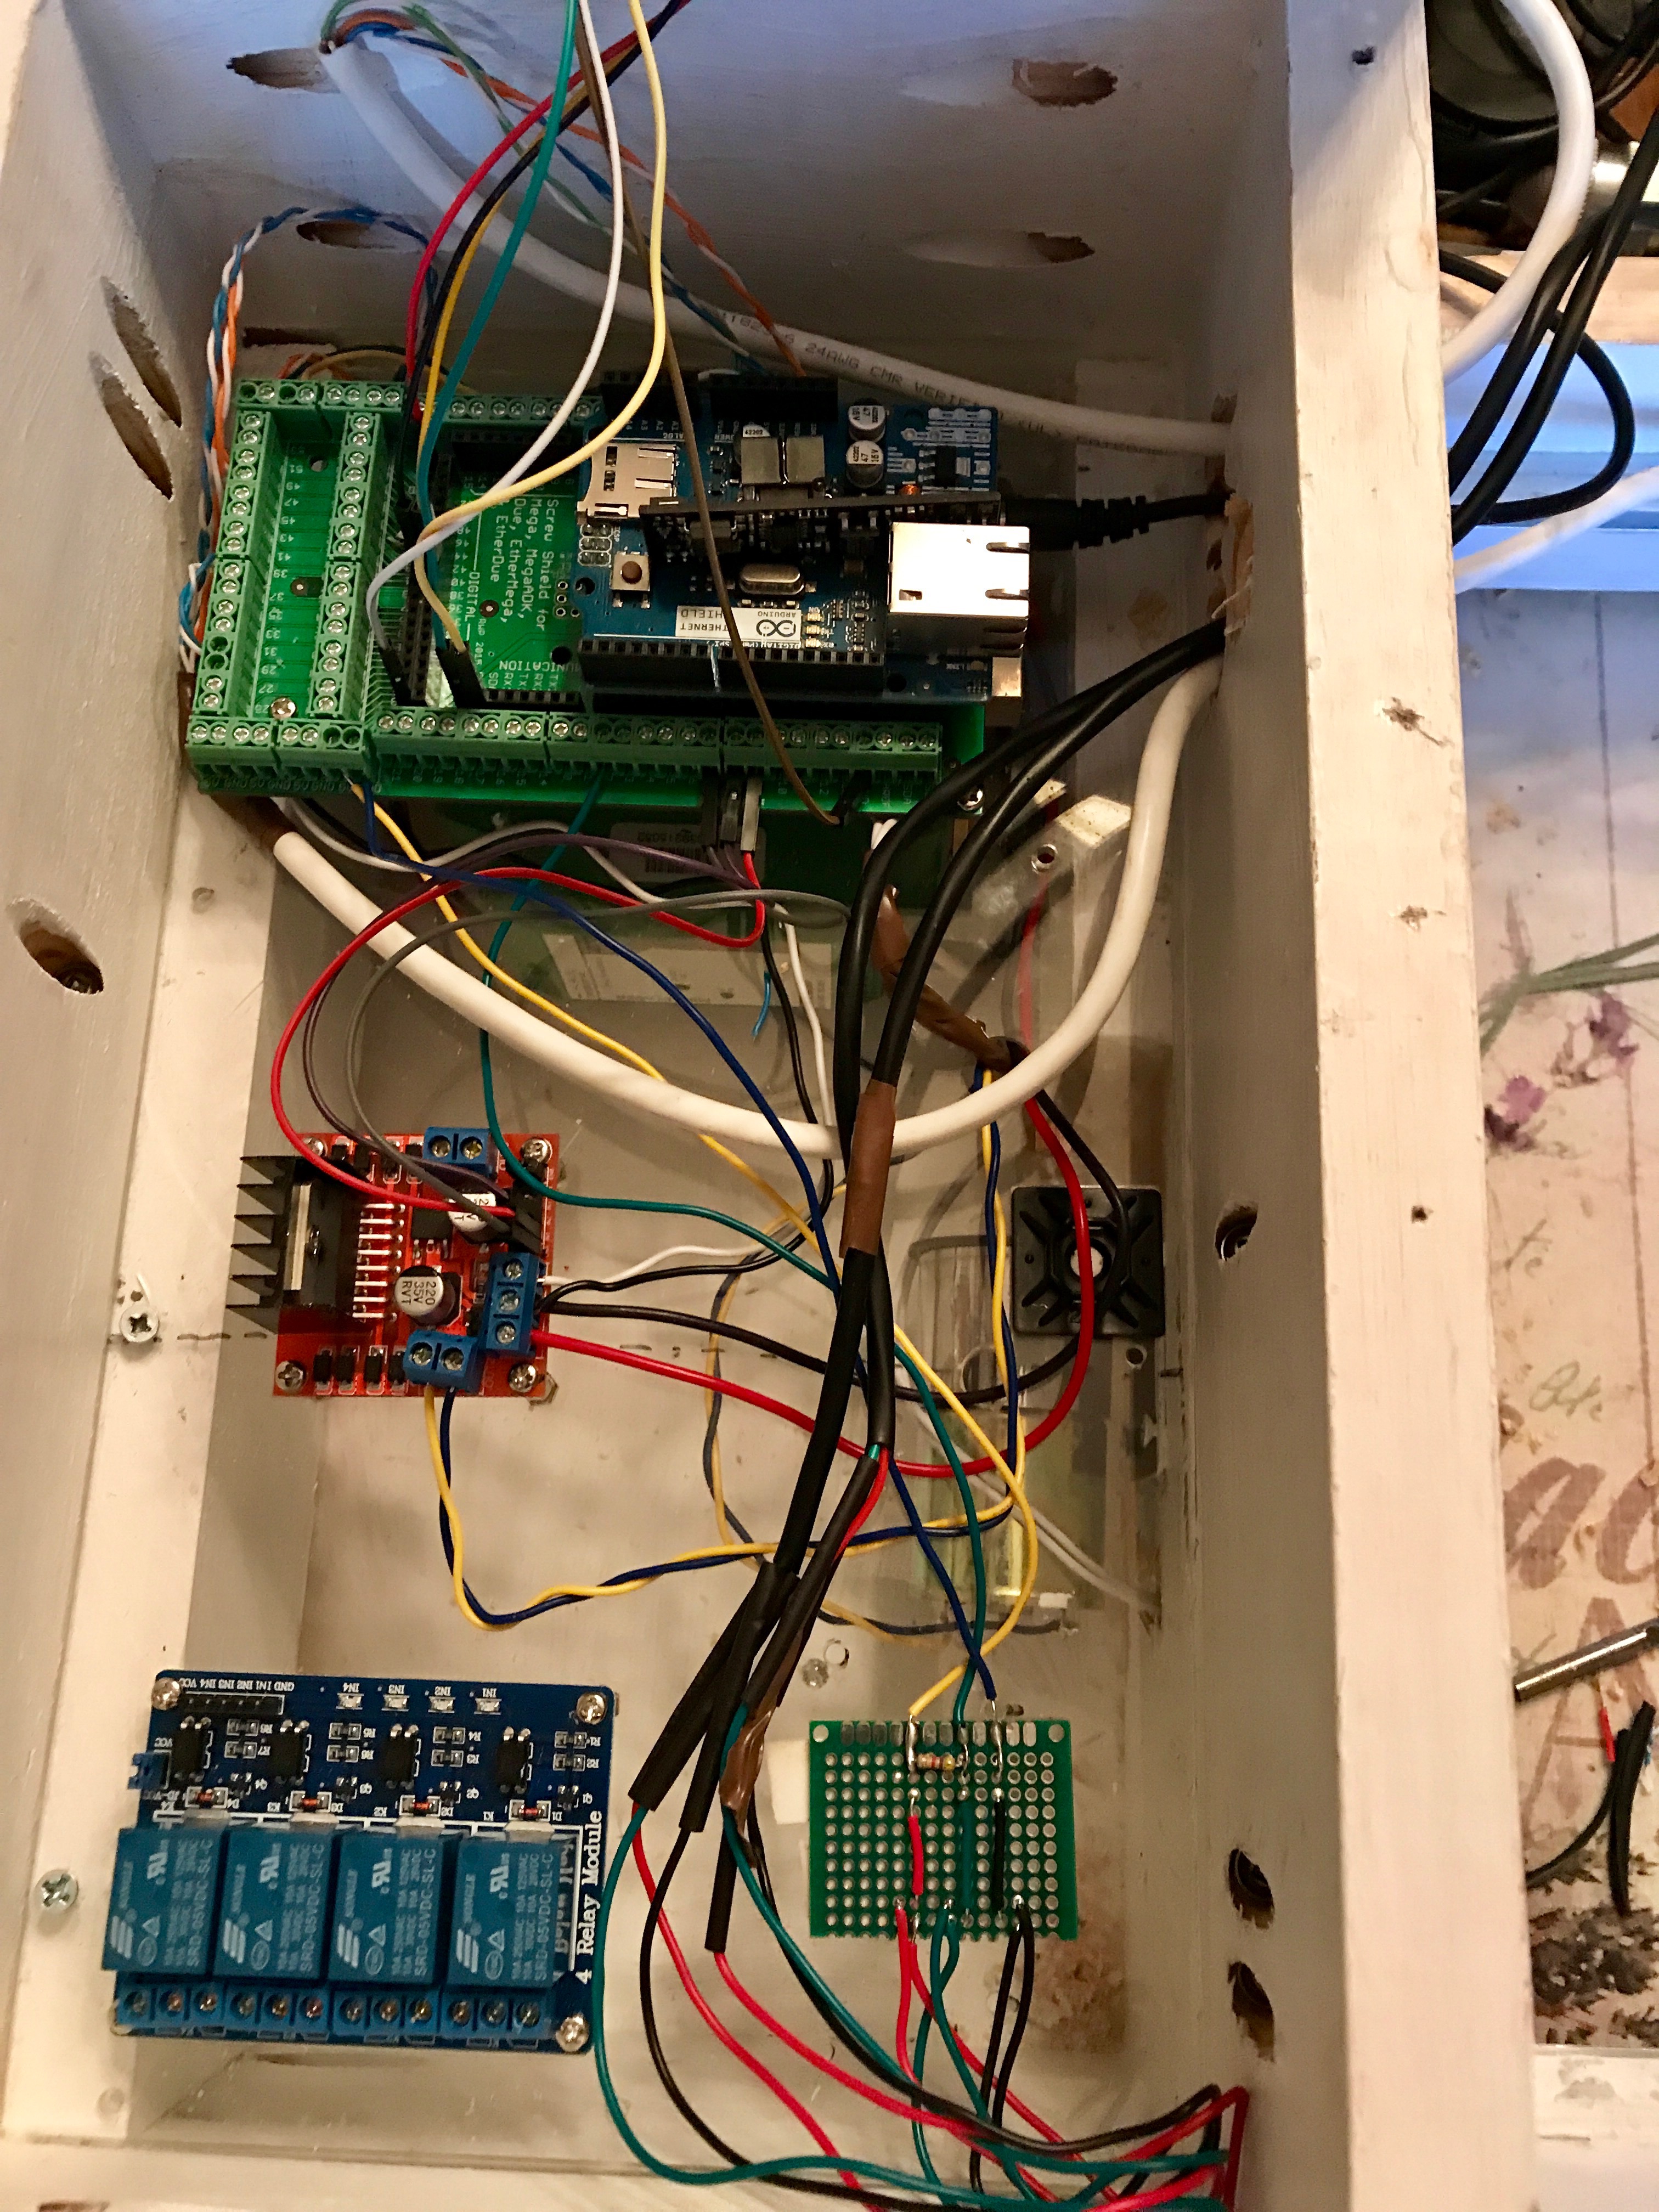
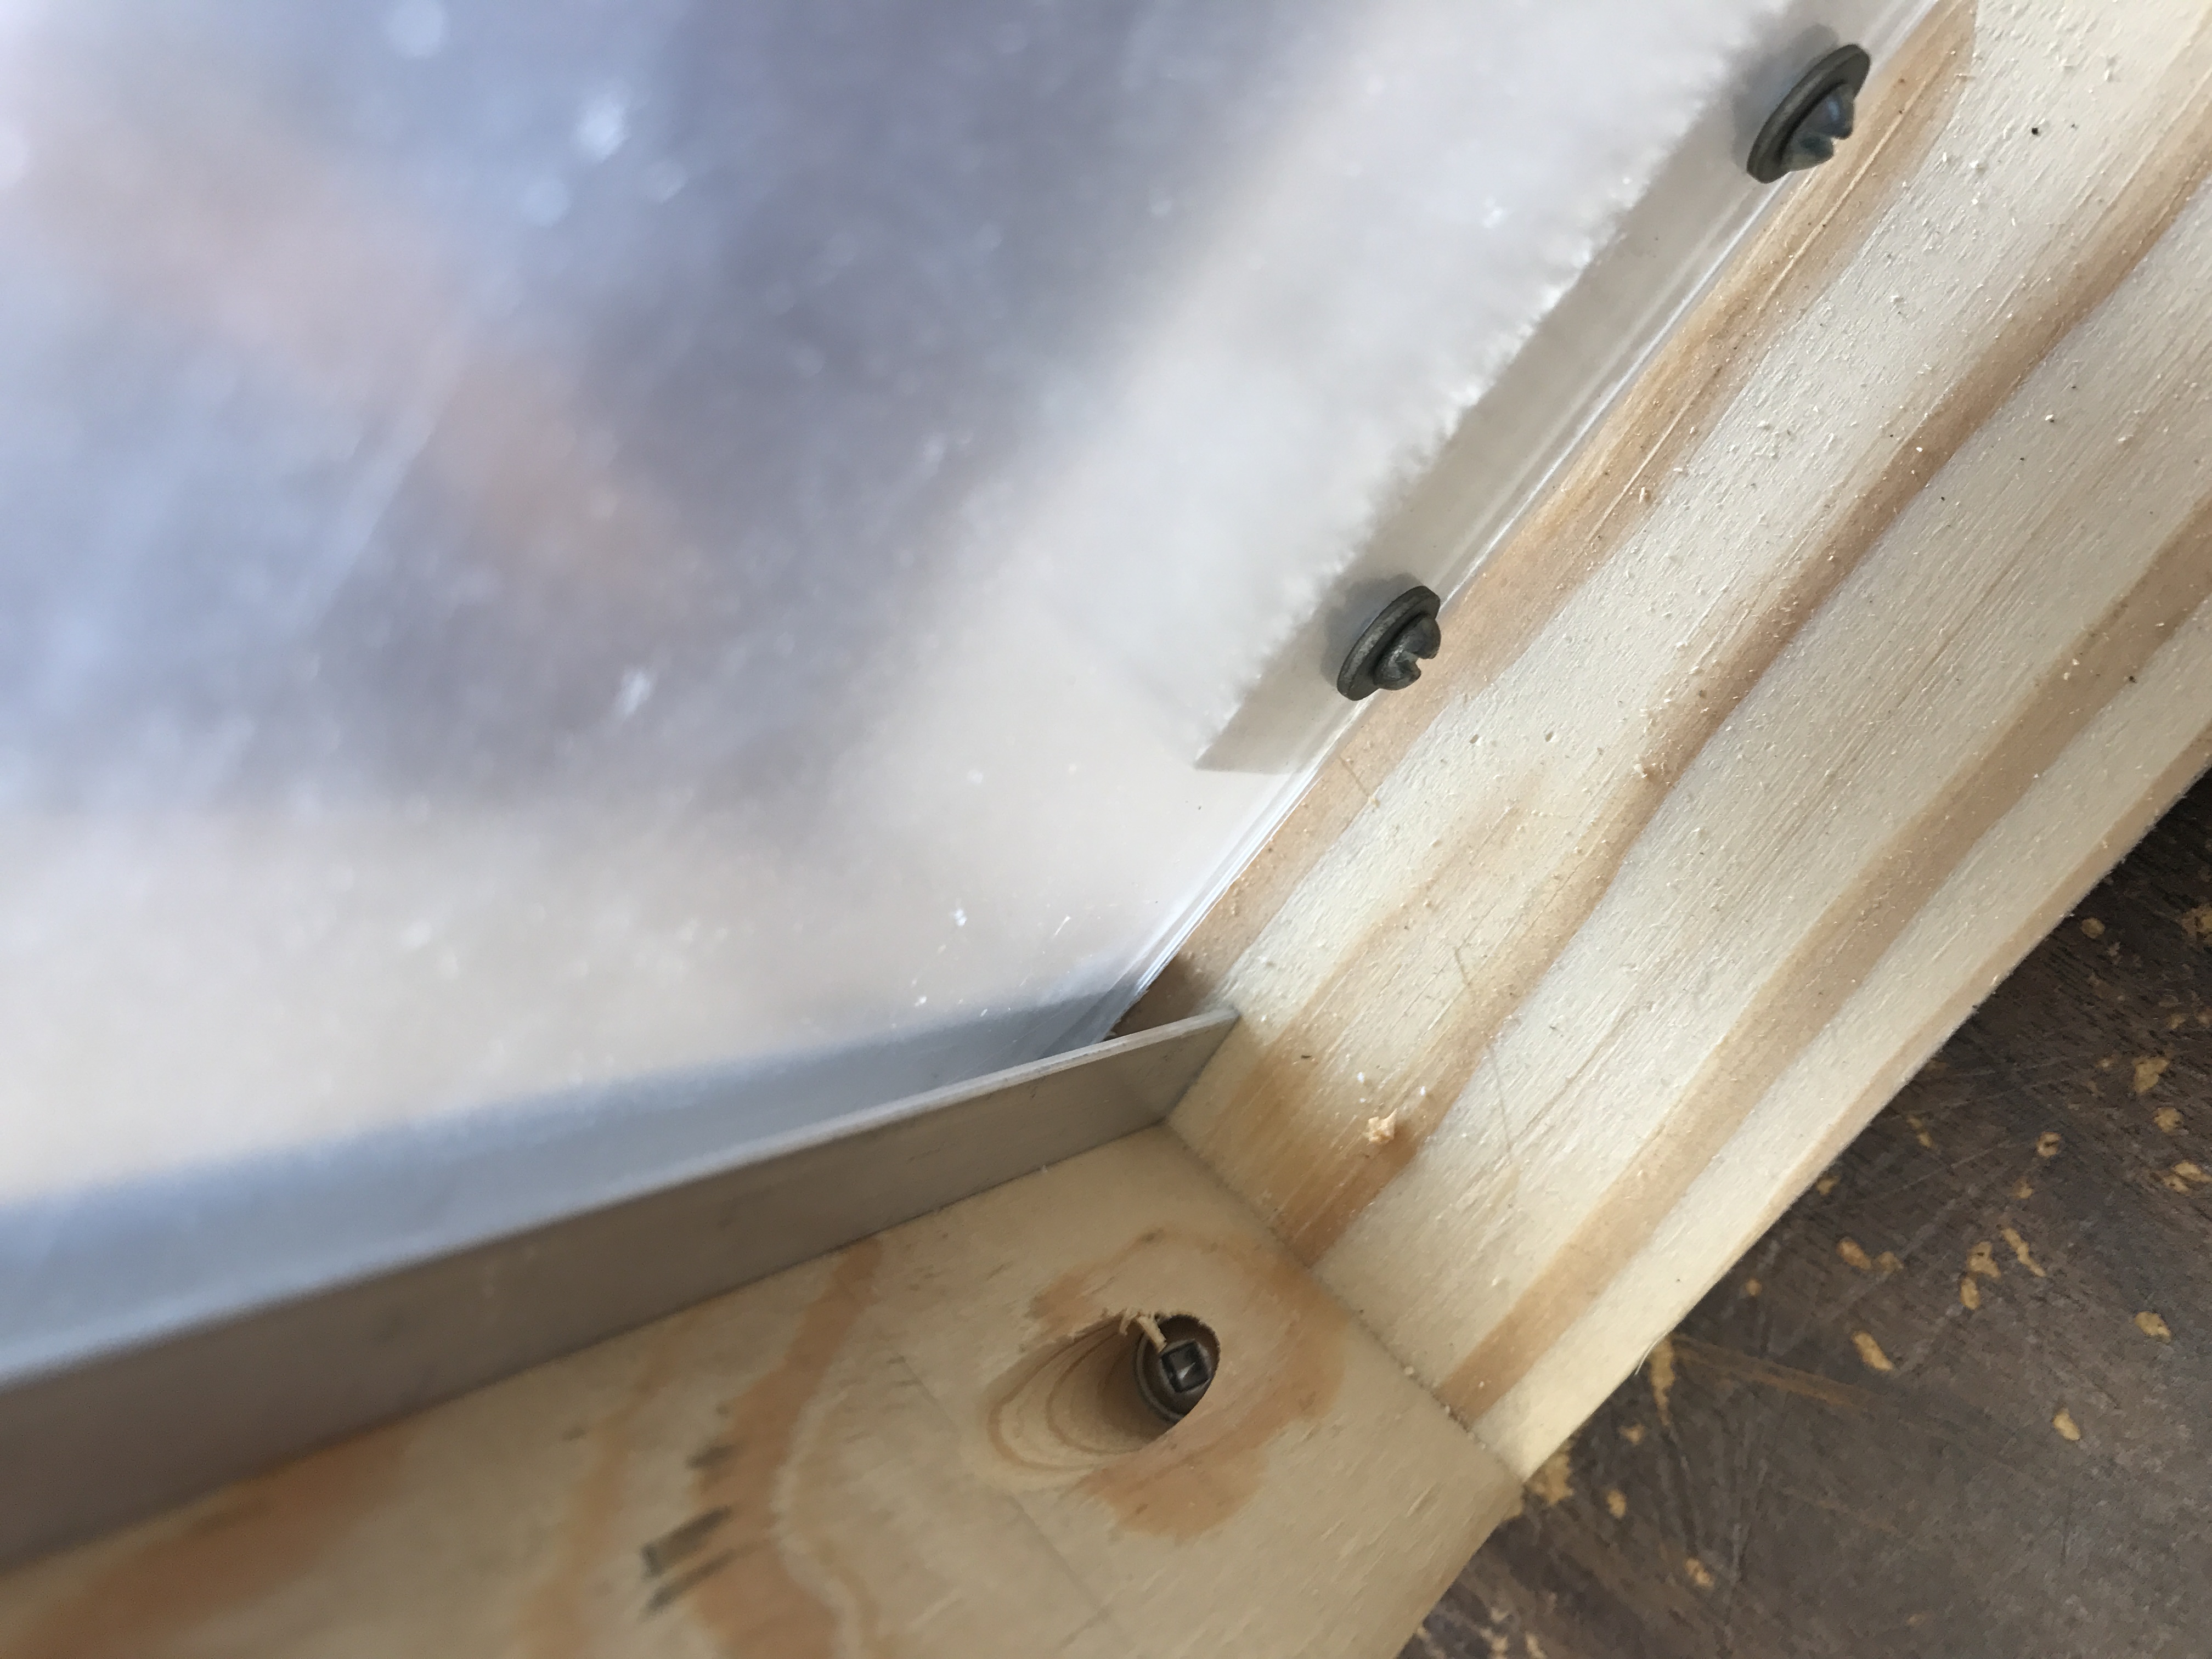
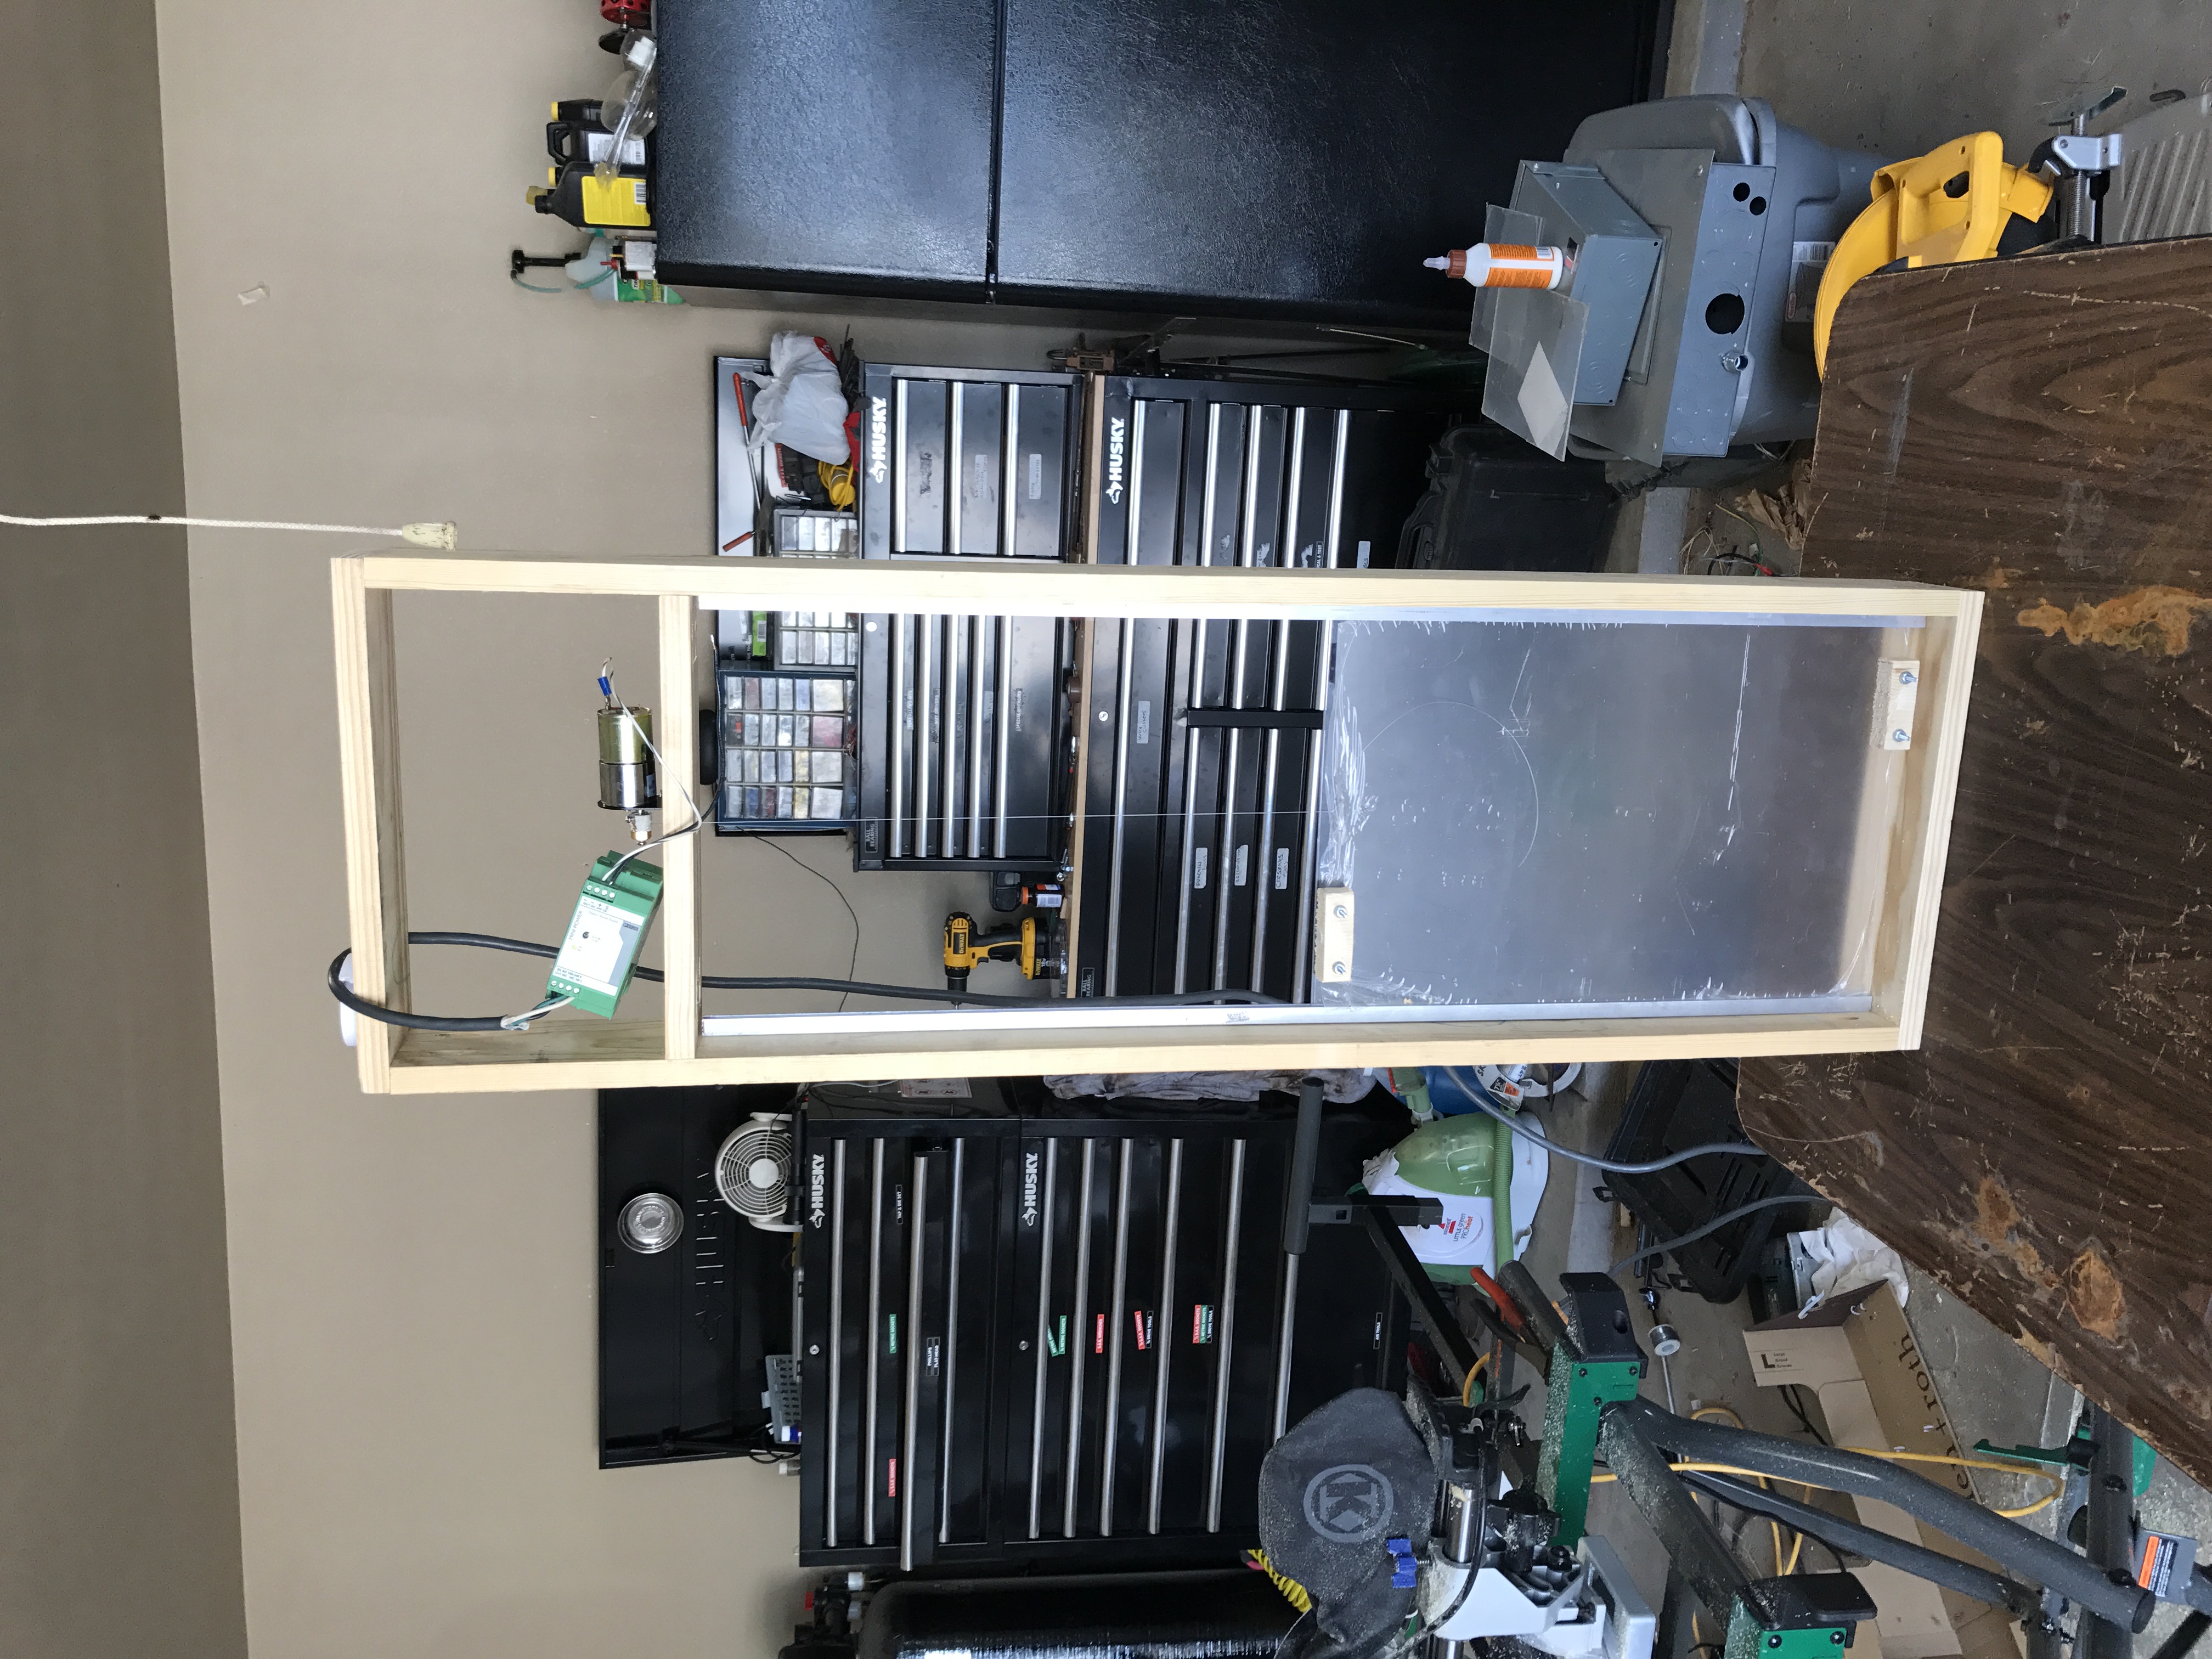
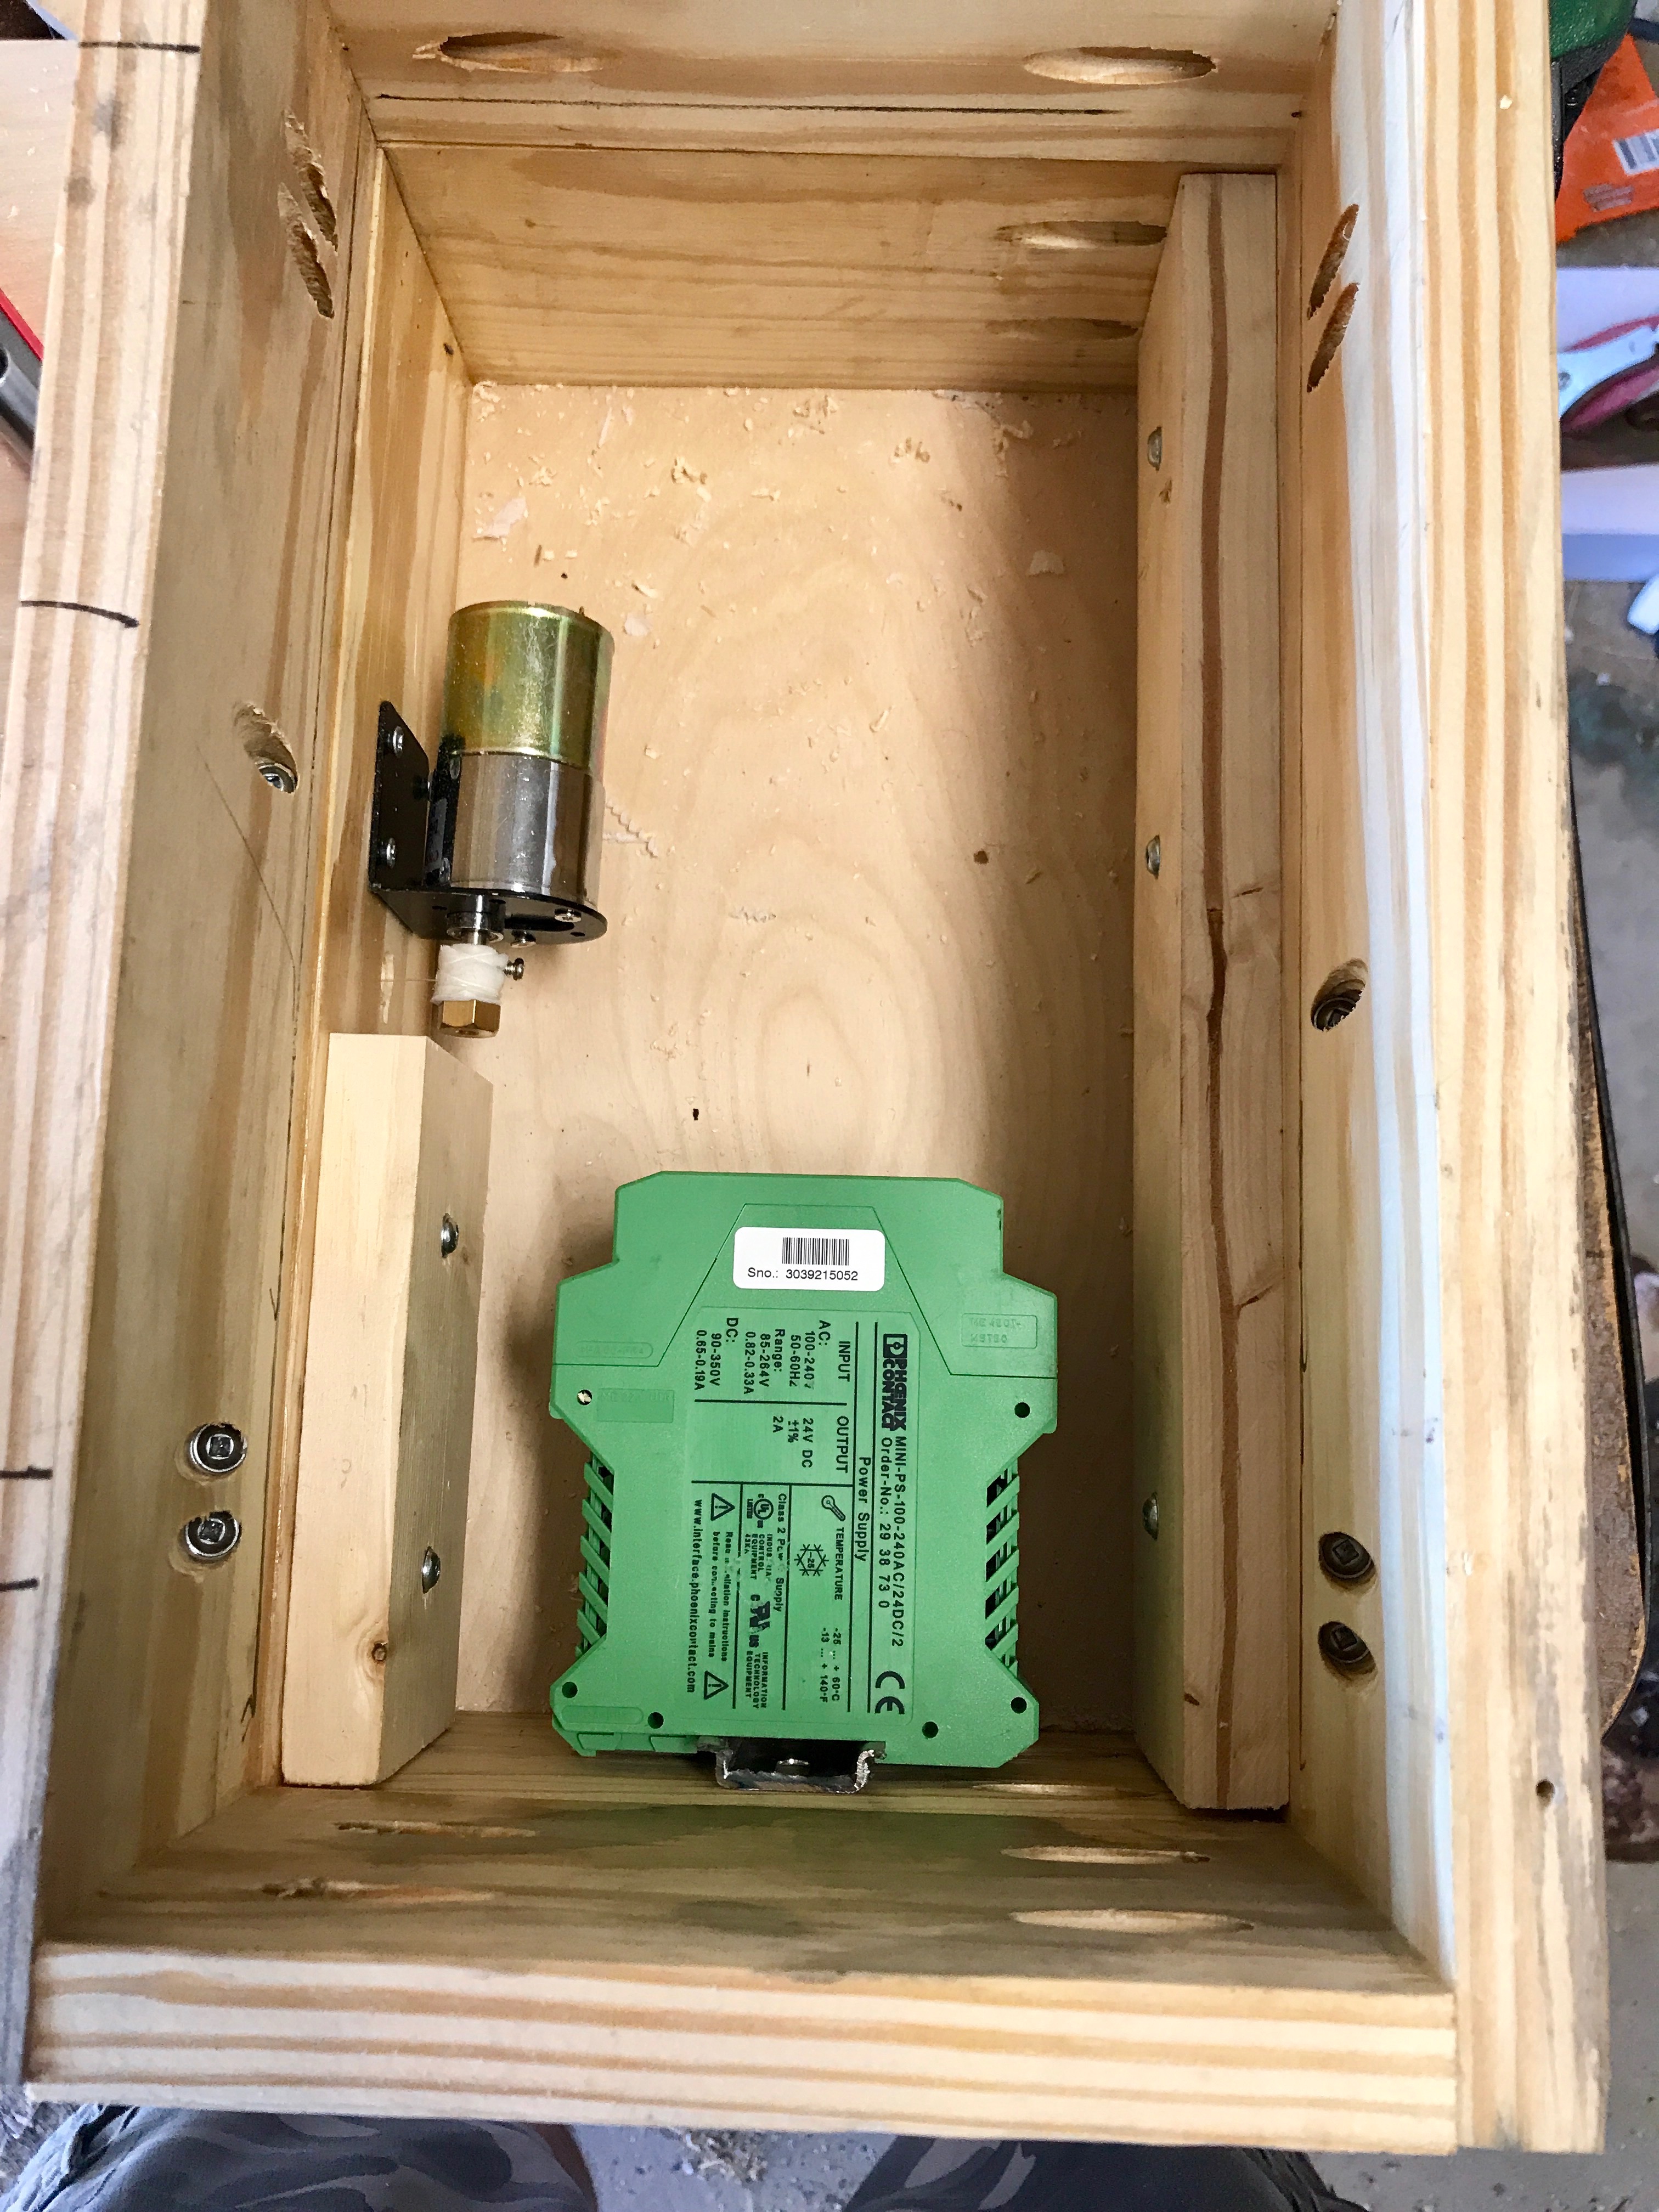
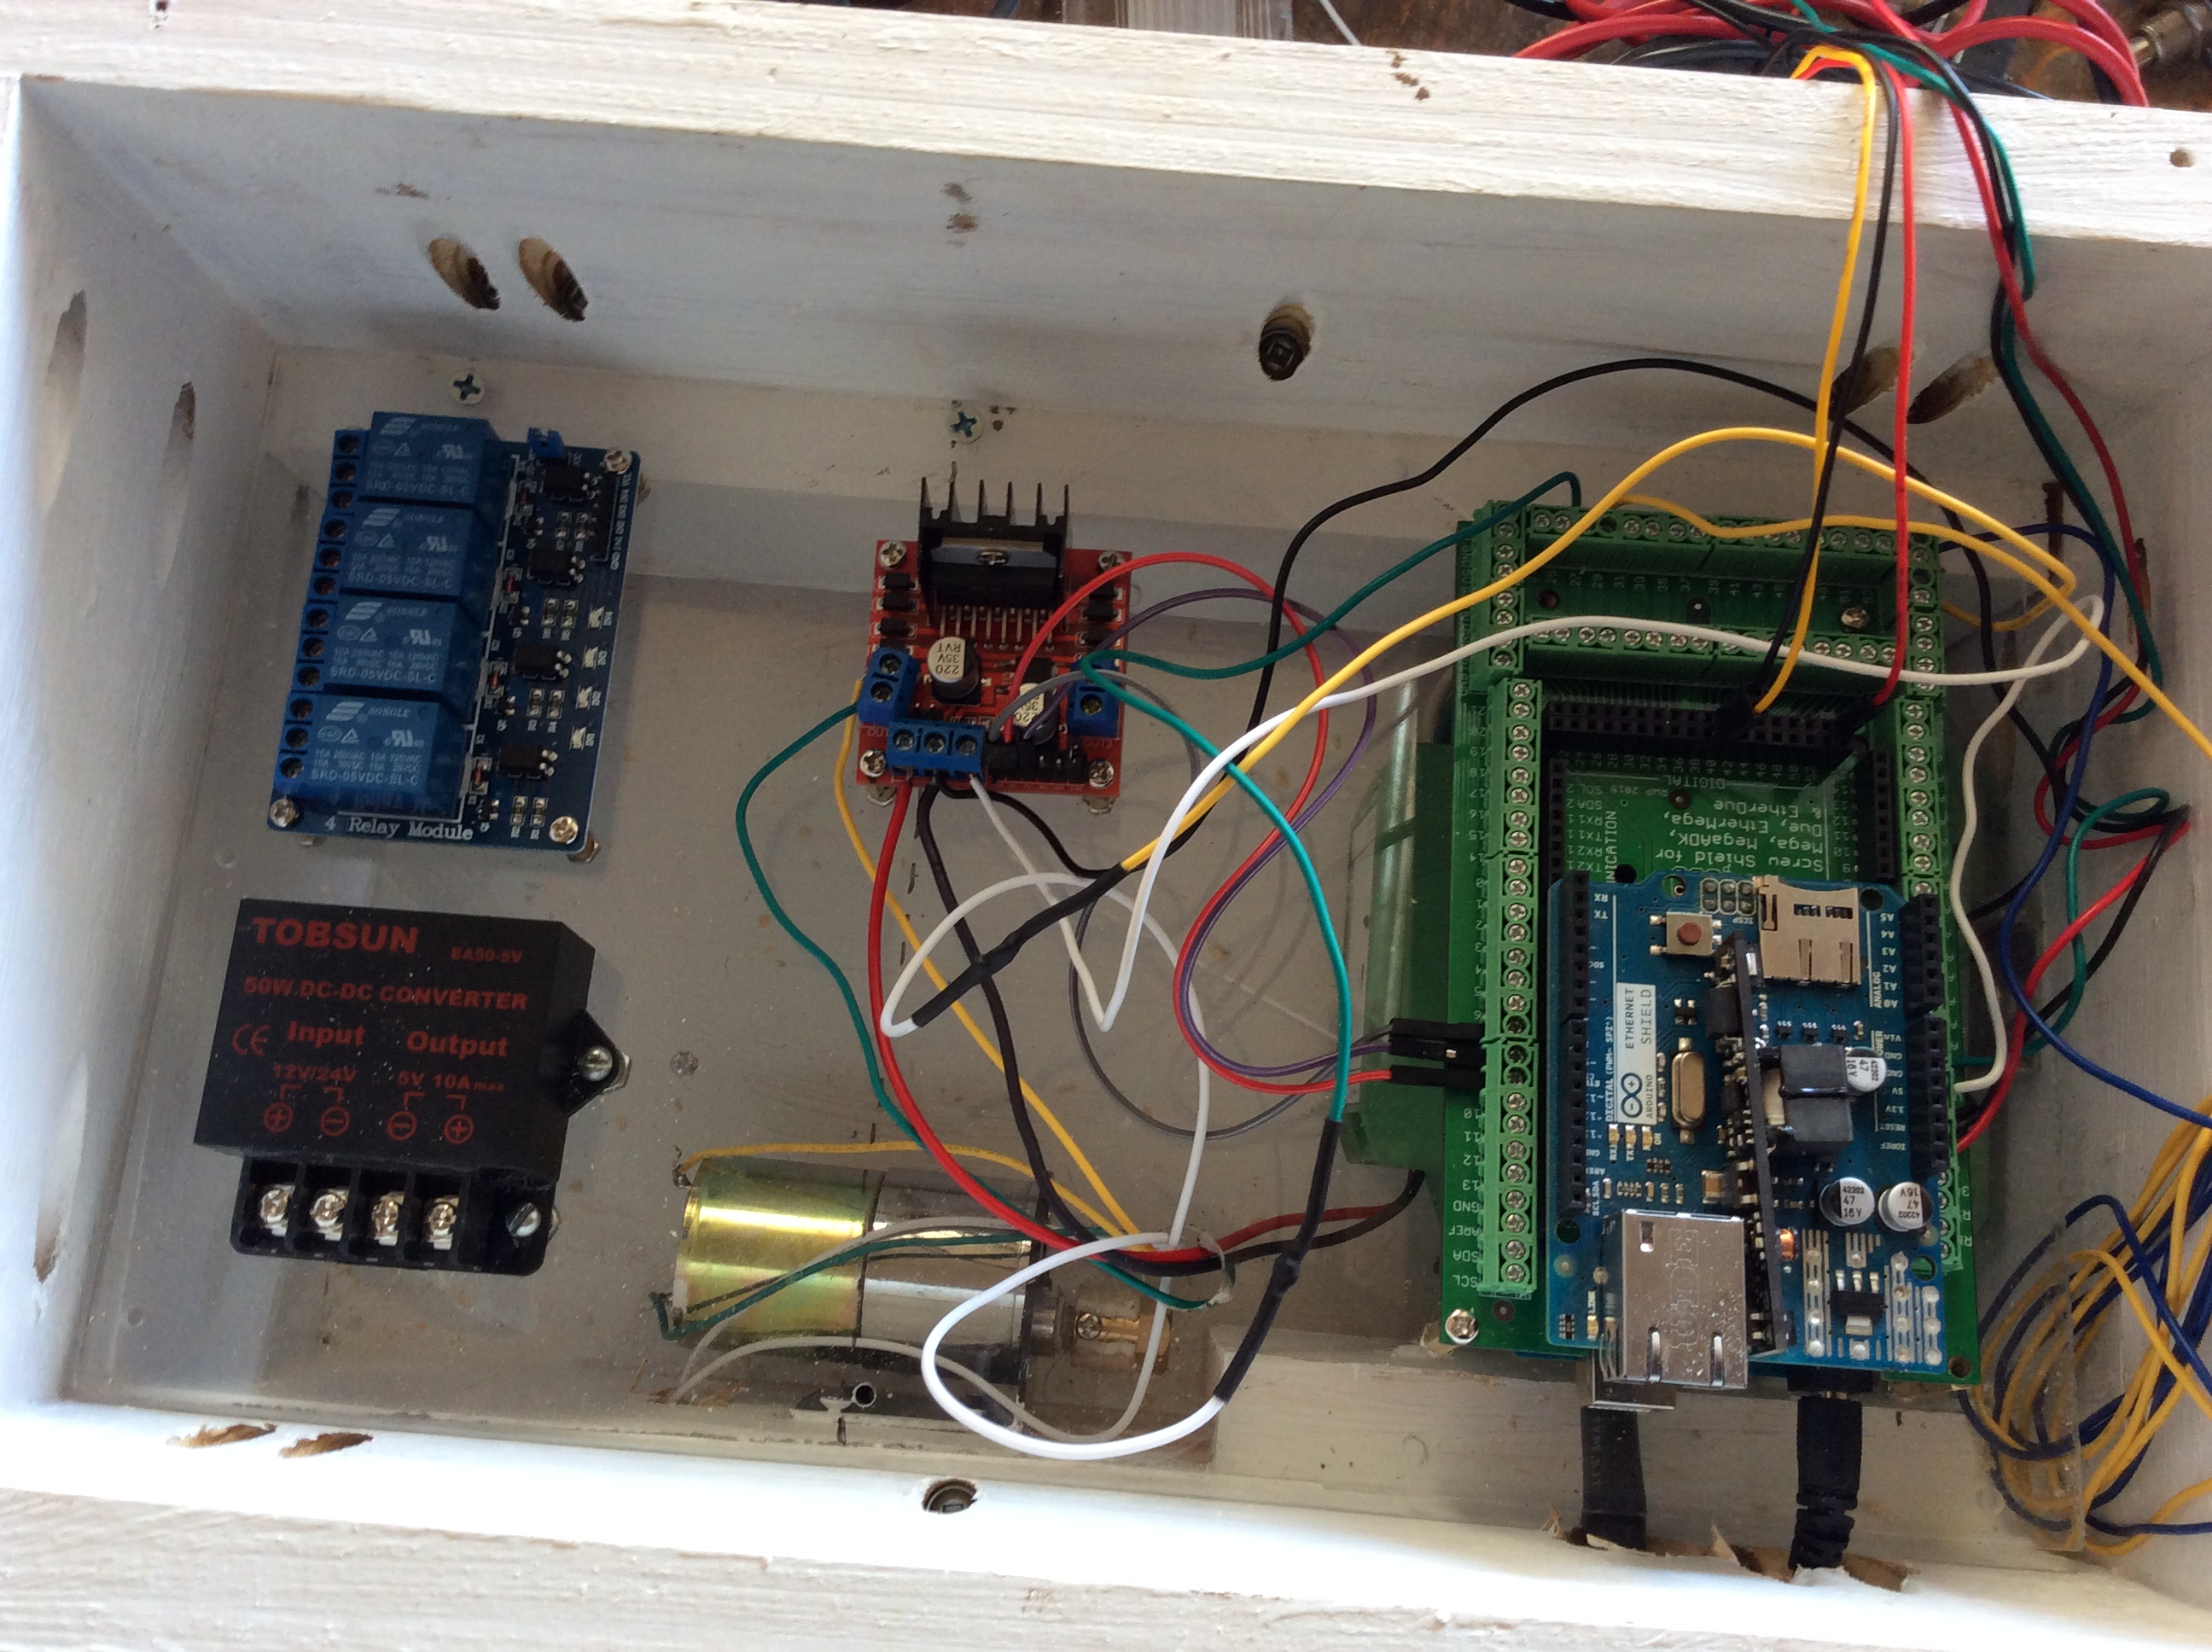
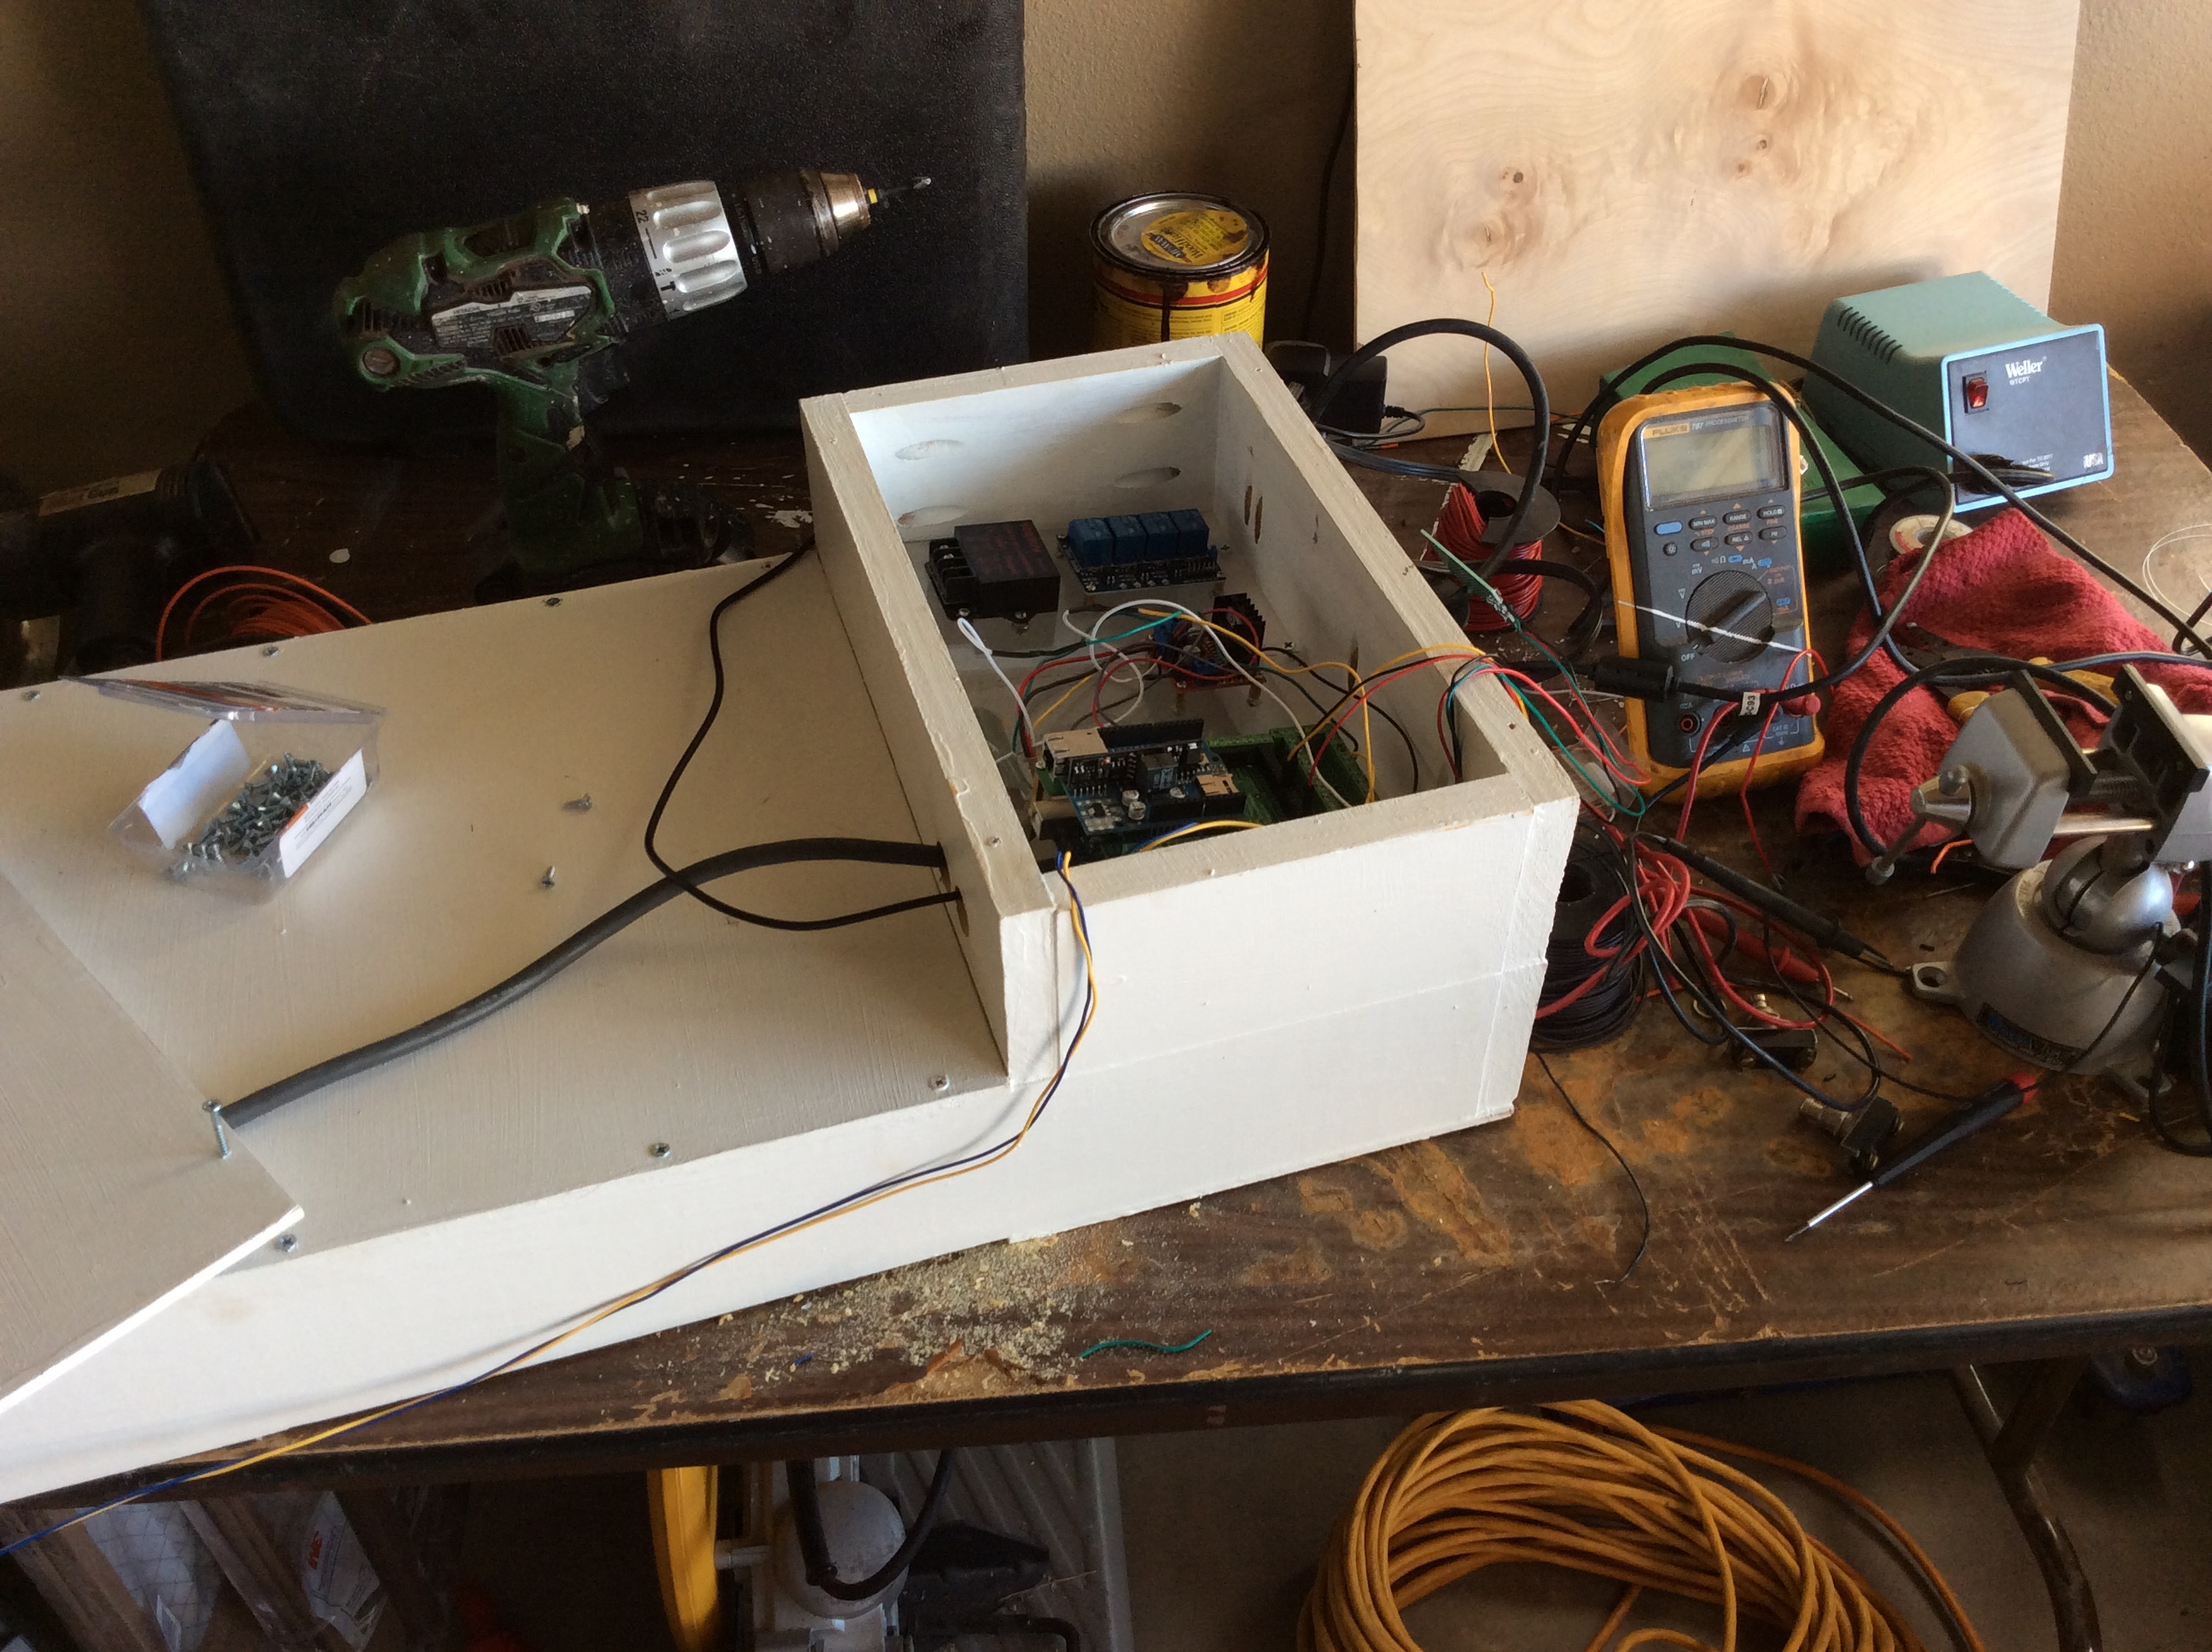
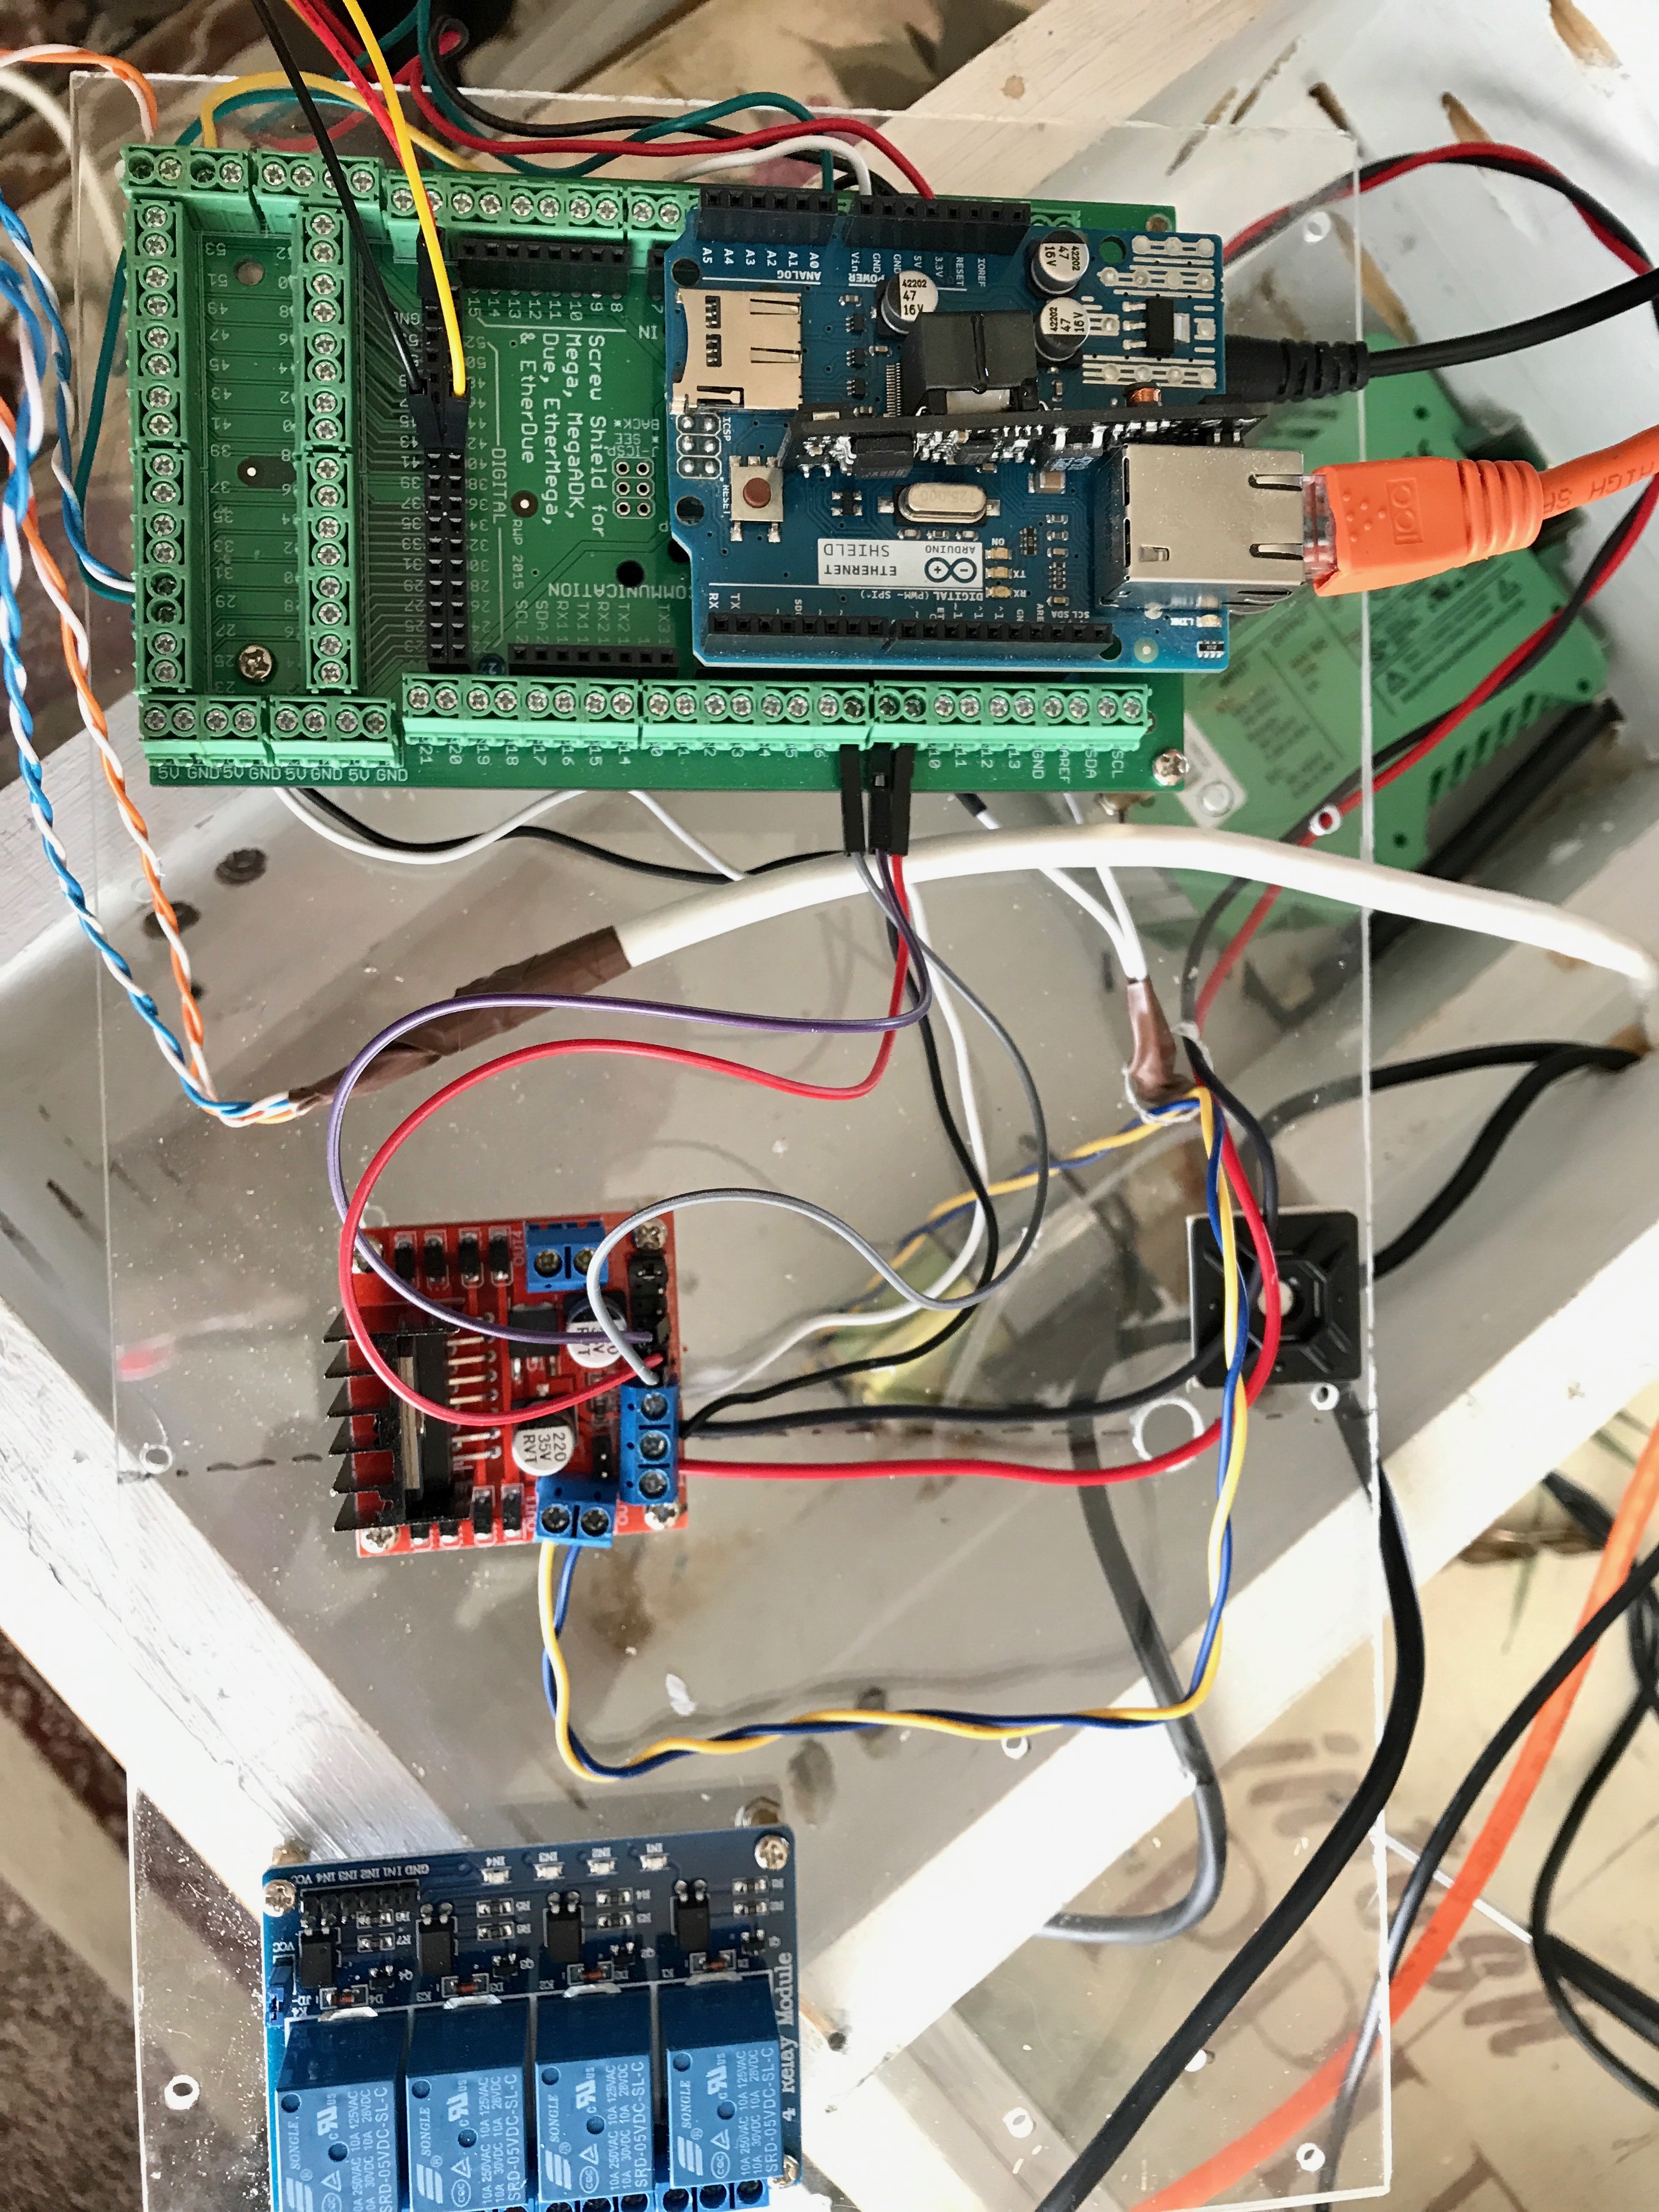
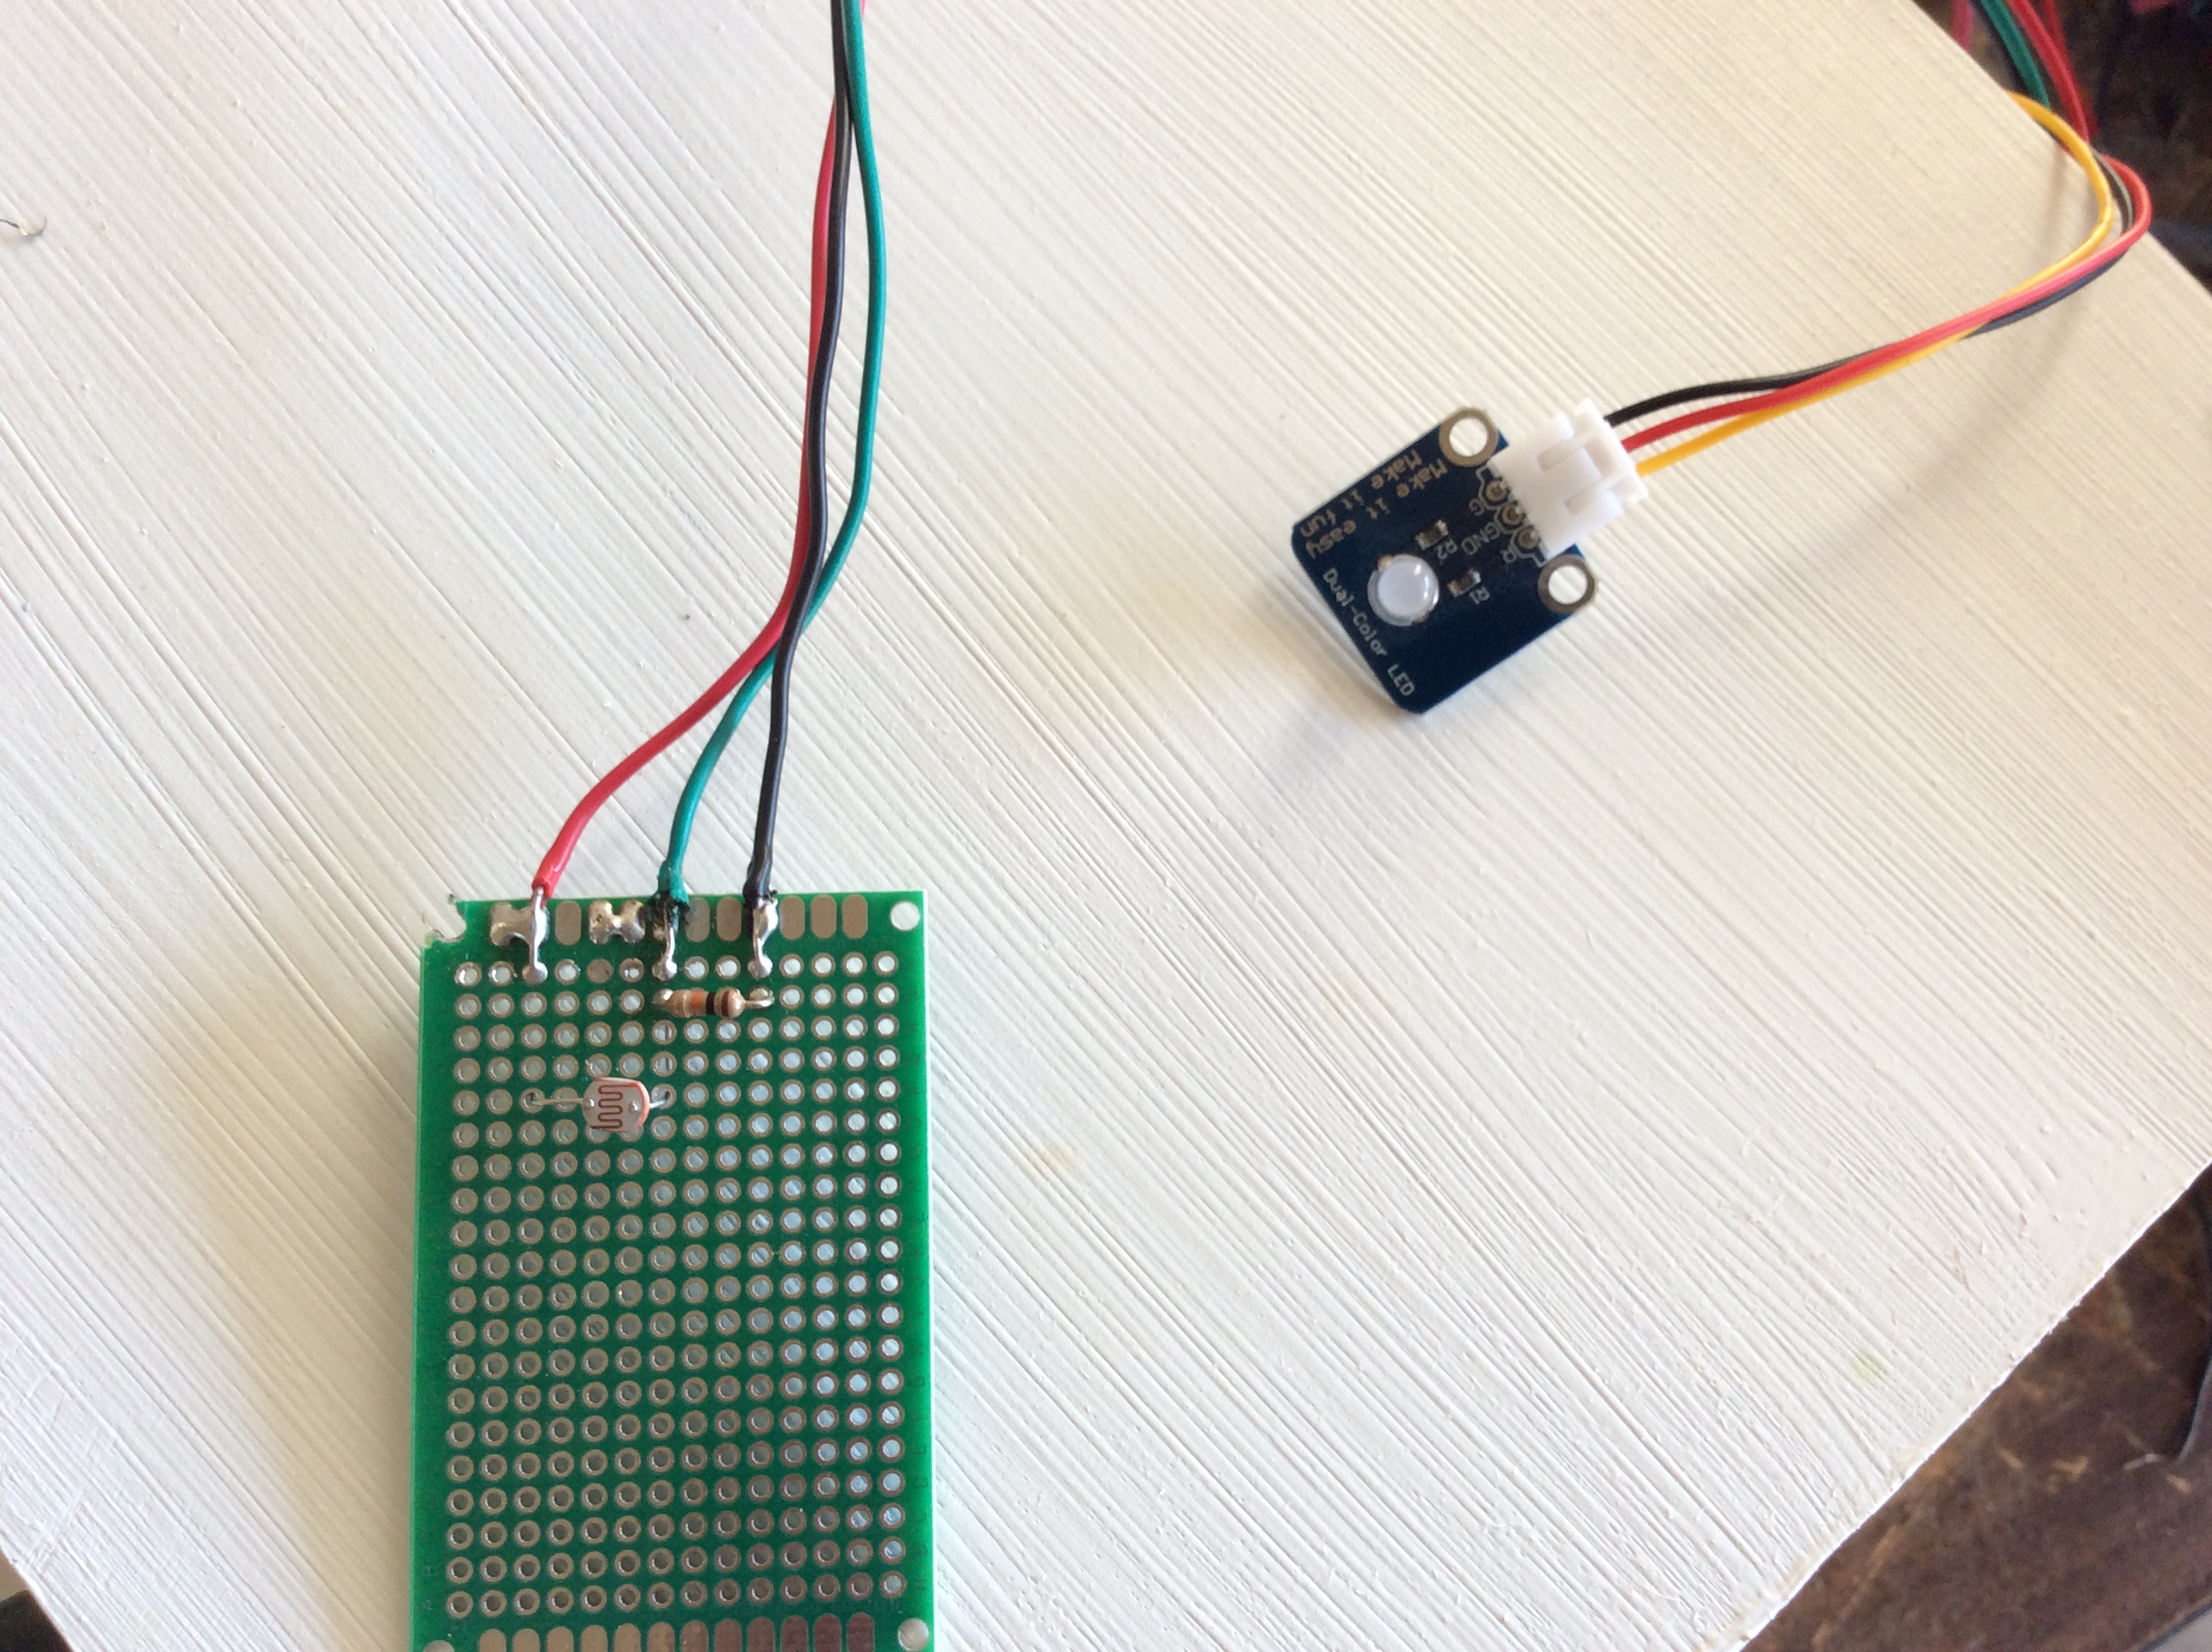
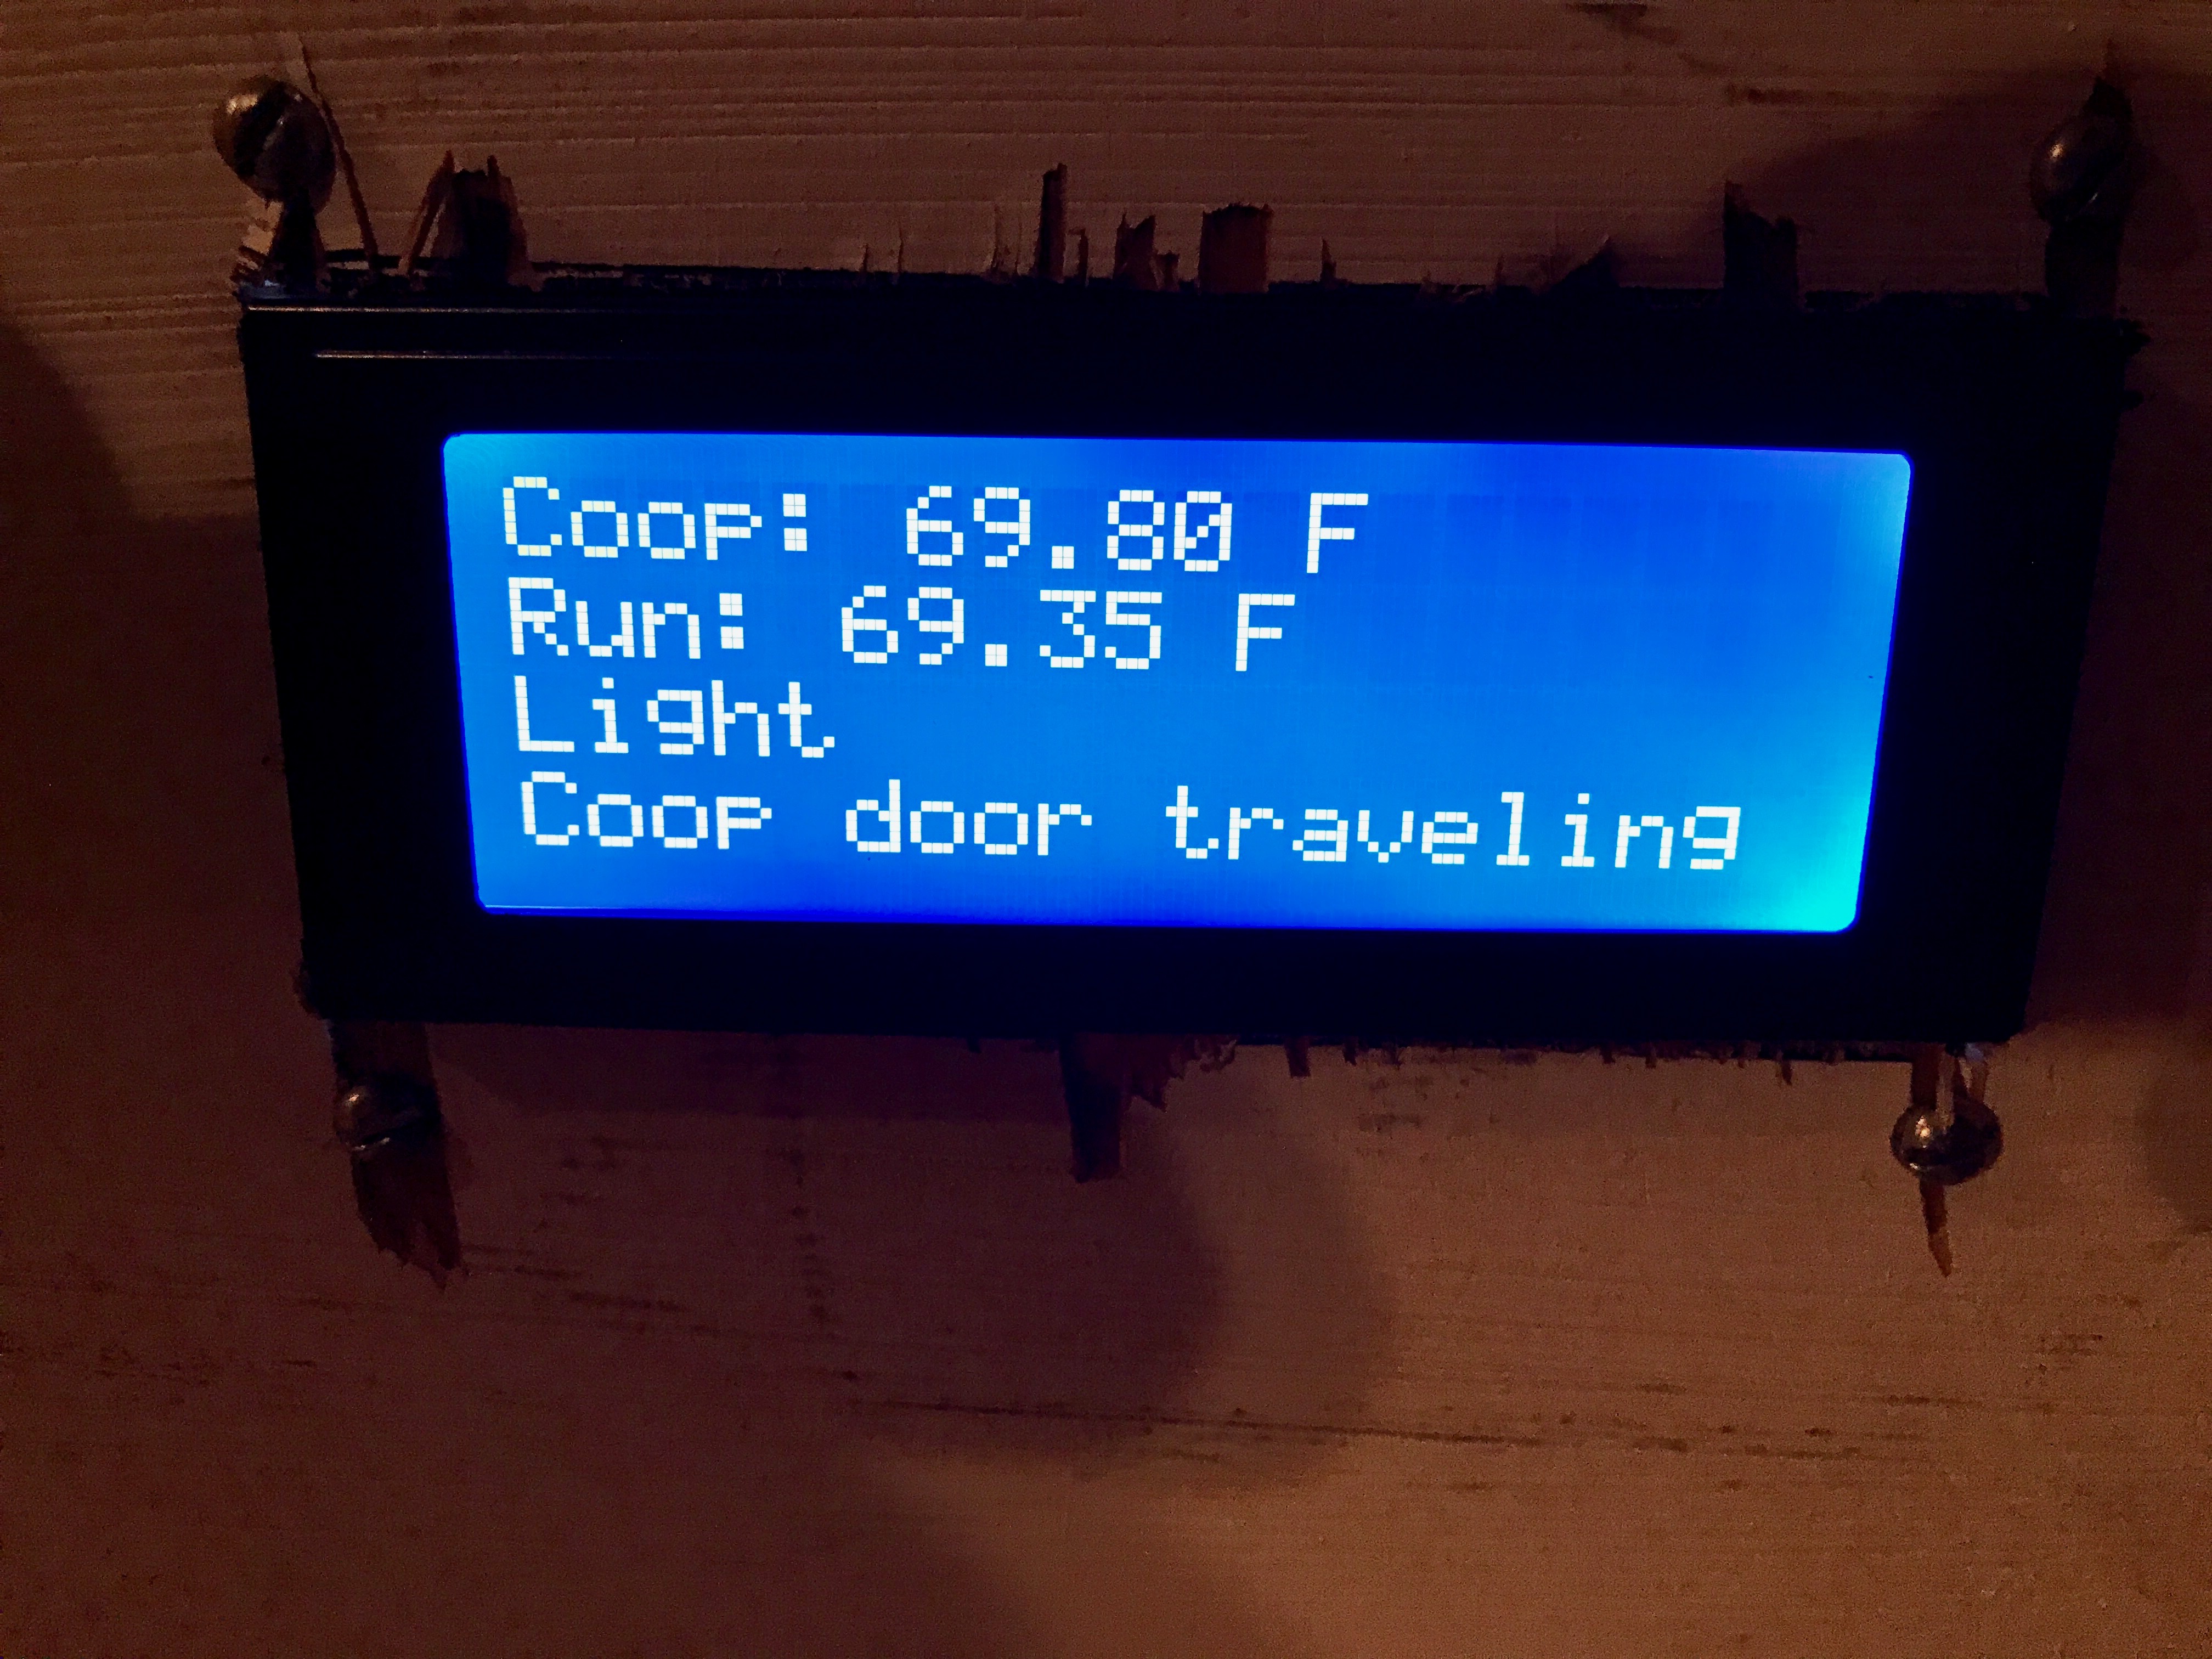
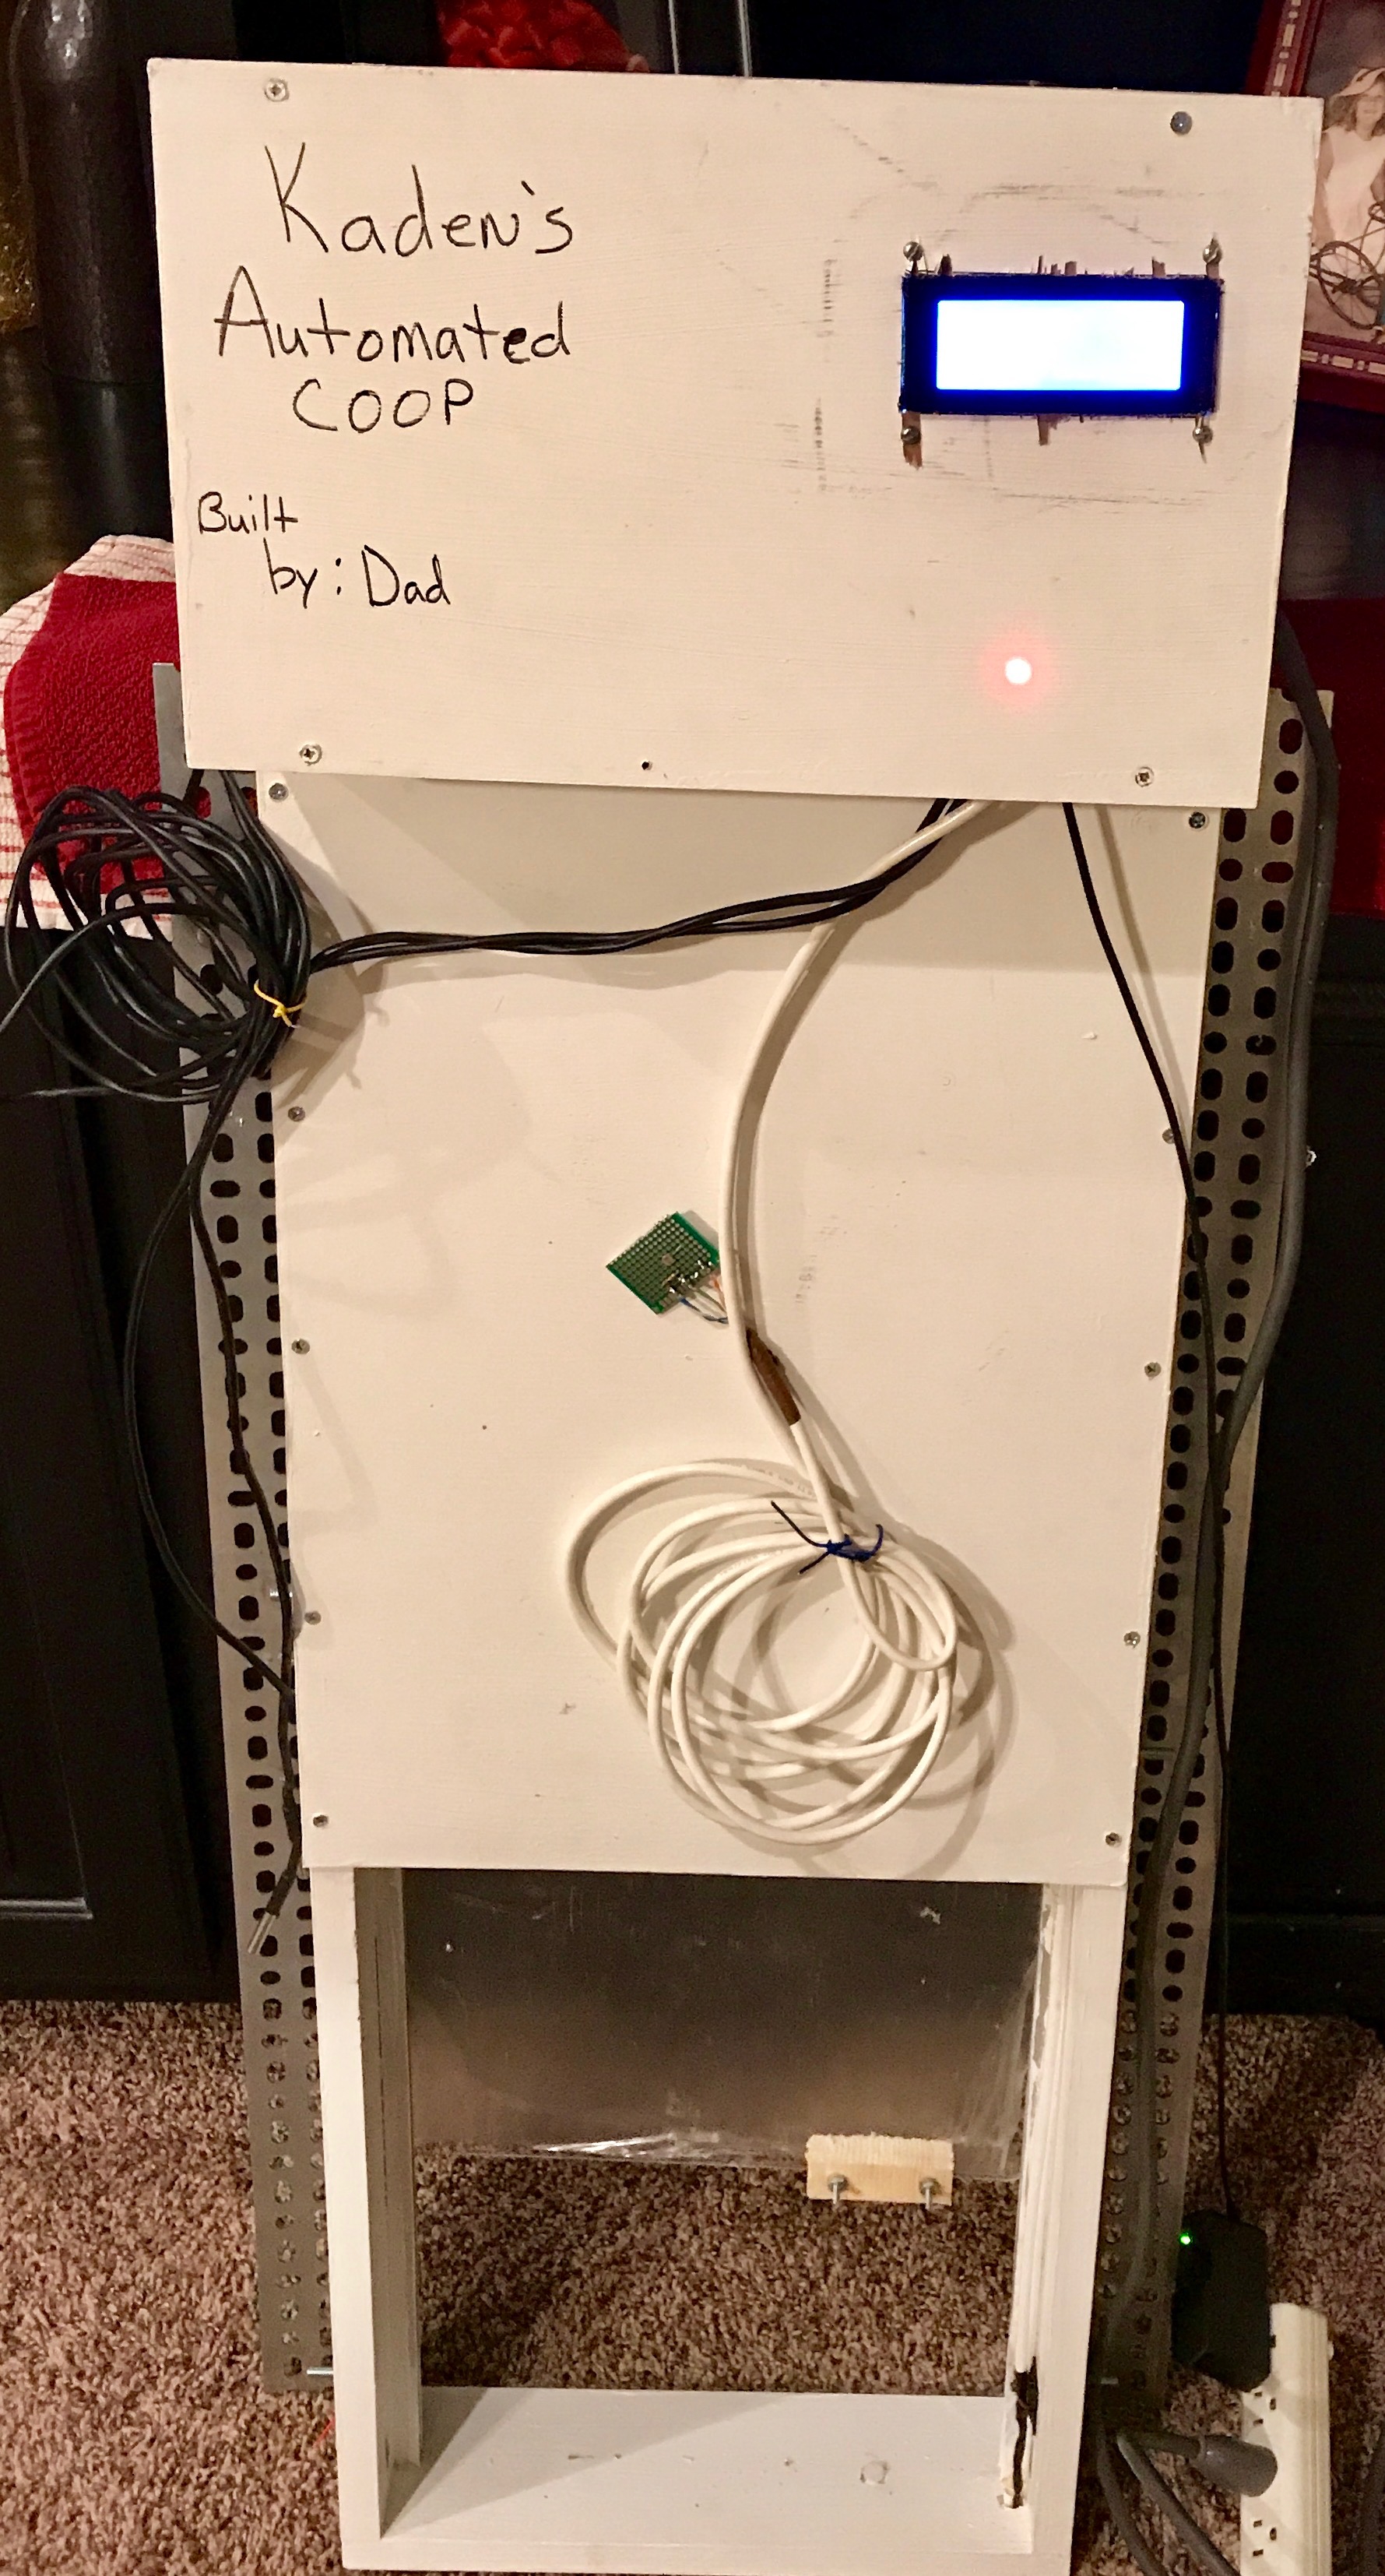
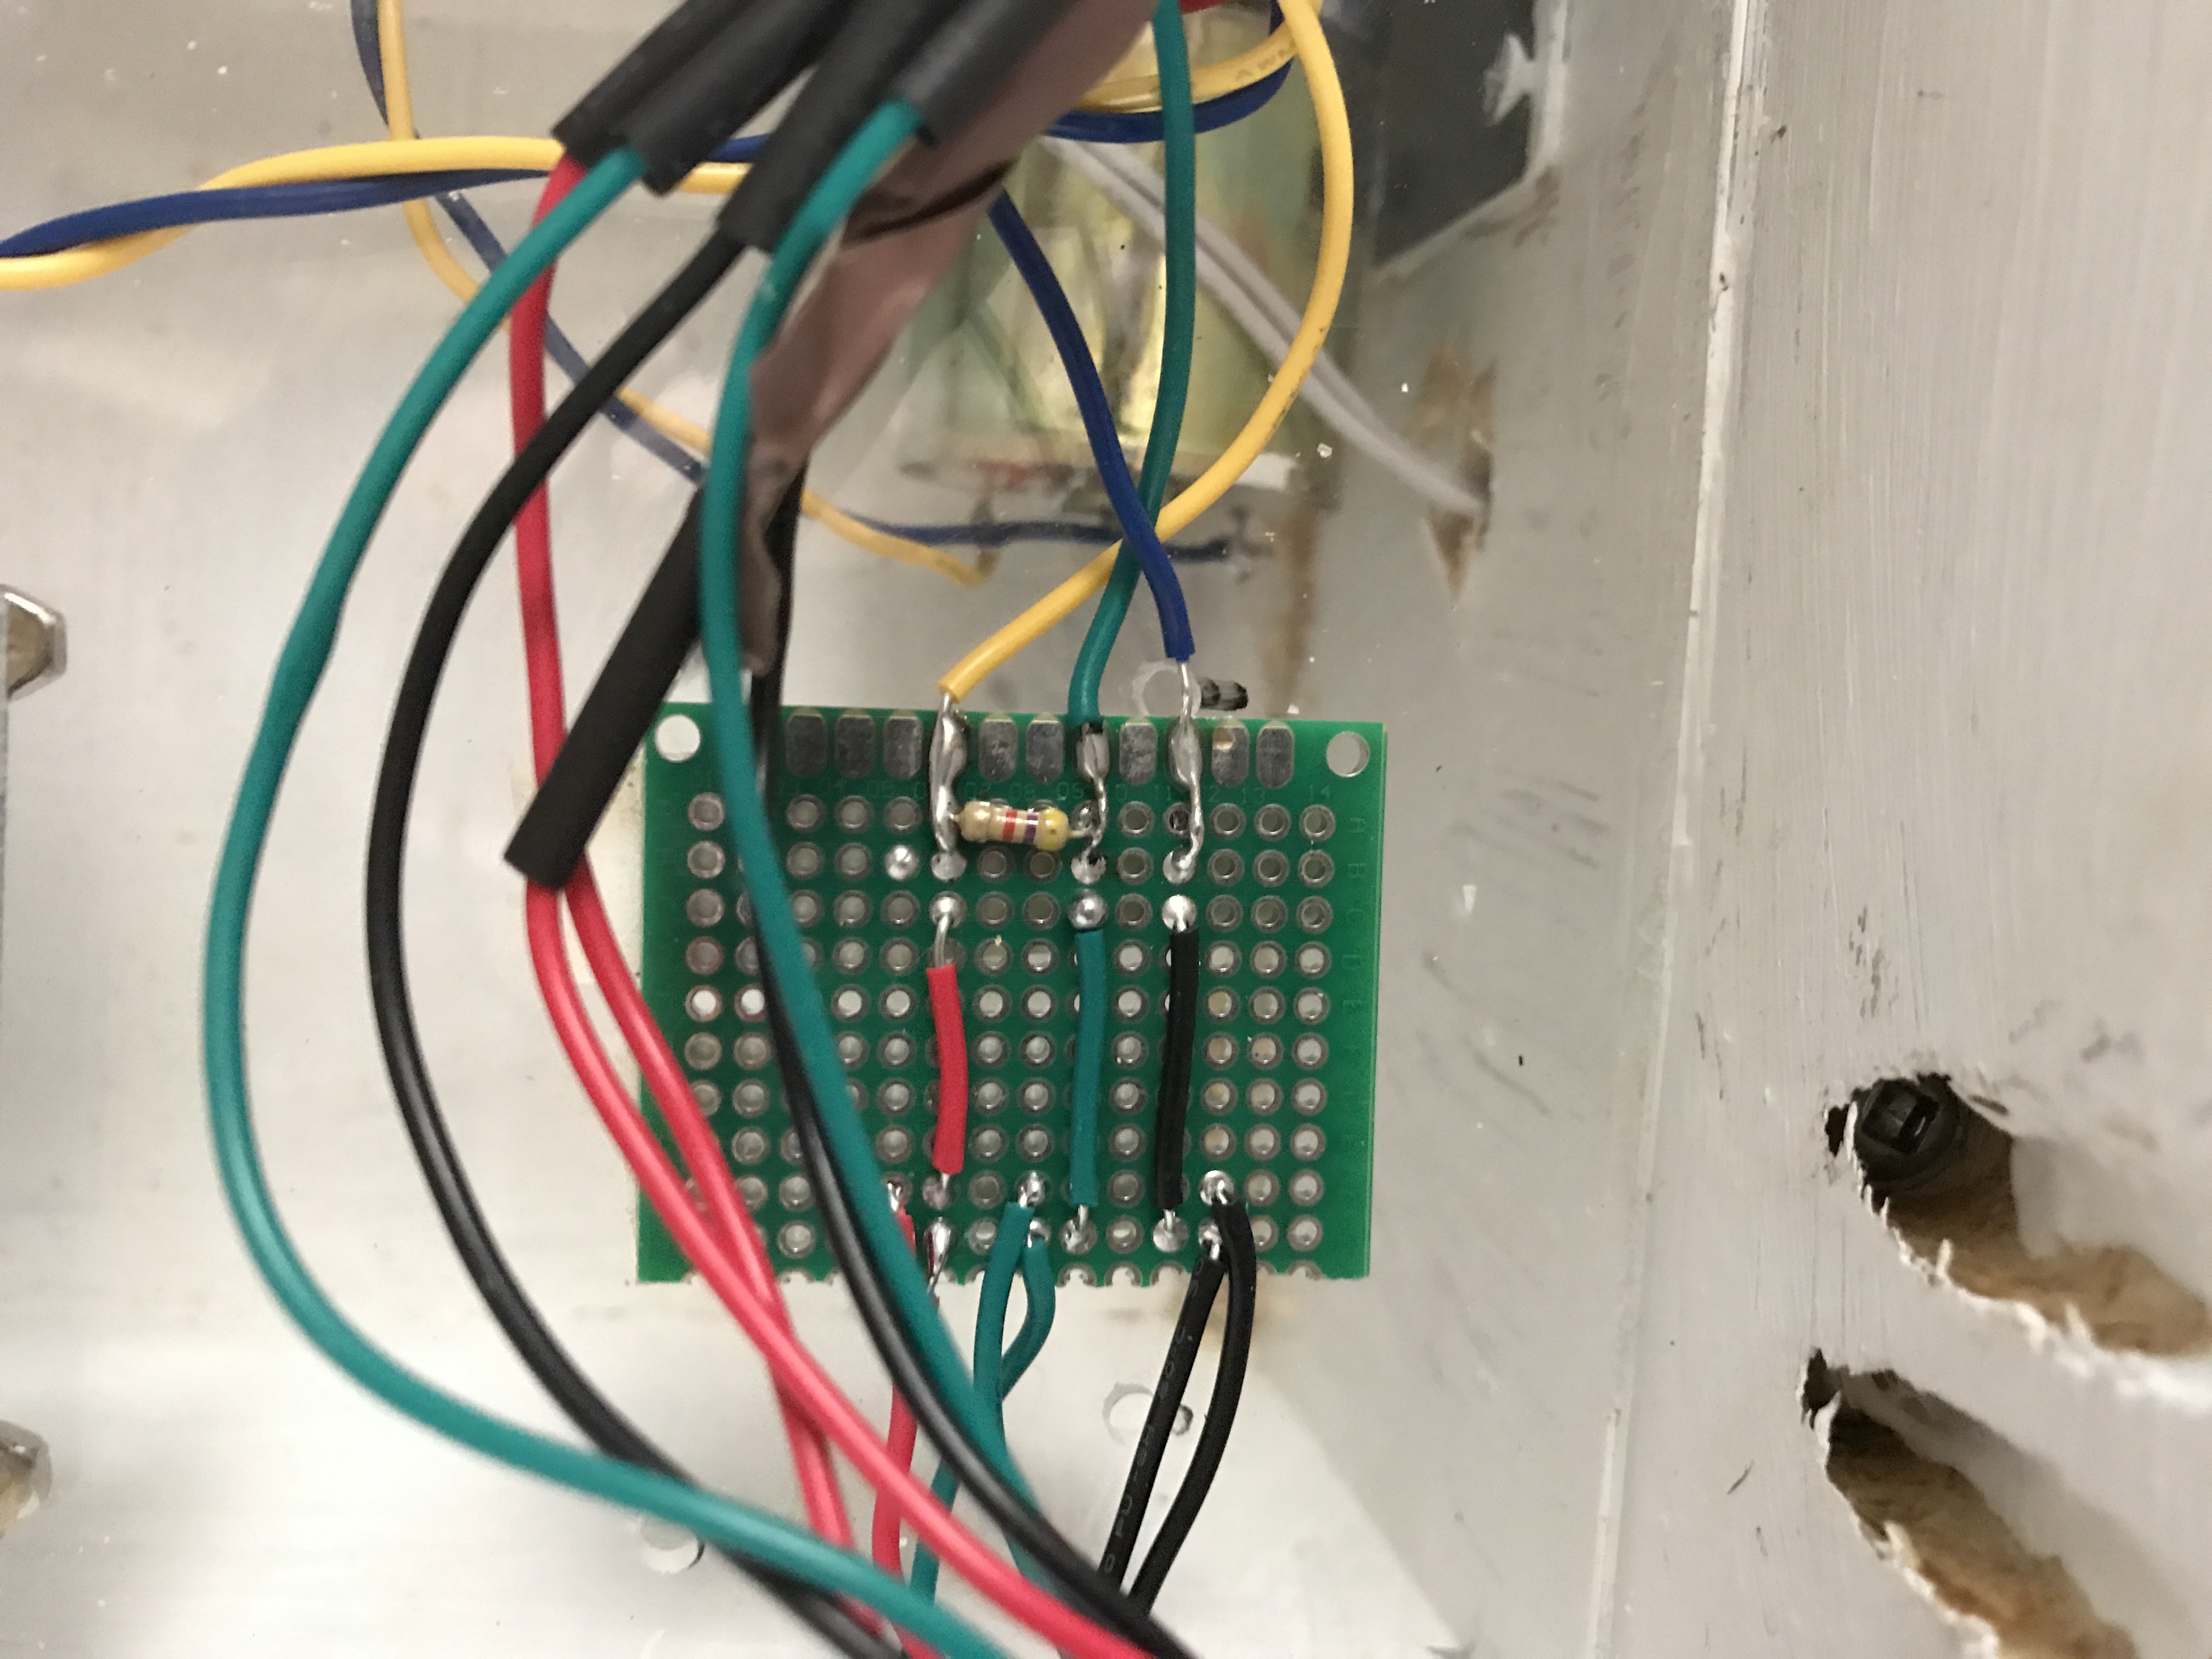
You will need to be your own carpenter and build the door unit. I will share some ideas though. I purchased some ?” x ½” aluminum “U” track for the door to travel in. Wood swells too much out here and has a tendency to bind your doors up. I learned that while building the coop. I also used a piece of plexiglass for the actual door, again of the same reason – and I had it laying around. You can look at the pics and tell how I did things. Sorry – the pics are before the clean and dress of the wires and all.
You have the files – so let’s try to do the rest with pictures and few words. Captions are below each picture.

So, there ya go. Not sure what else you’ll need from me. You will need to get the parts, devote the time, and have some fun.
I will update once everything is done and I am feeling better.