
Hunt Camp update – the stove!
I don’t get on here much anymore. Just have a lot of things going on. I figured with the wind down to Christmas (or wind up if your the kids), I would do a quick update on a project I completed today. If you want the long story….keep scrolling. I wrote a short story at the bottom.
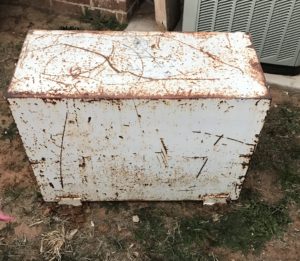 I started with this steel box I was given (left). It looked to be just the right size for what I wanted. William decided to order one of those Barrel Stove Kits. So, we discussed me putting the door of that kit on this box. My reasoning was this was thicker steel and would hold heat longer, and we could possibly cook on it as well. At least make coffee!
William and I found some old steel legs or L brackets for something – but we figured those would make good legs. We found some other things that I loaded in the truck that I thought would come in handy for handle/grates on each side. As you’ll see, we decided not to integrate those into the build just yet. The size is a little big, and we want to think on it a little longer.
We acquired William’s stove kit and stove pipe (20′) of it. ha! Then we gathered the welder, my acetylene torch, cut-off saw, and all the other tools we would need.
Next William picked up some fire brick for me at Acme brick in town. They were the best price we could find. The 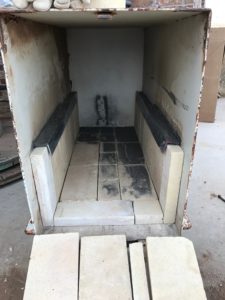 original design called for 35 bricks. William purchased 40. I still have about 14 left over. Mid-build redesign!
Then I began drilling out the bolt holes for the door. We cut the door, and flue hole. I then went through the process of welding things together. I also took all the old paint off the outside with my angle grinder and put a fresh coat of high temp paint for engine headers on it.
I built a nice little handle for the door. Made a seal for the back door. I wanted to keep this door for easier access to the inside of the stove should we need to get in there. Glad this worked out. It makes it super easy to put the brick inside.
Anyway, here are some pictures. It took me a little while to get used to the wire feed welder. I have never used one until now. It ain’t all that pretty, but it will hold!
I stated the build and it only took about 10 hours from my estimation – over the course of 3 days. I did most of this while doing other things – so cut me some slack. Click here for a video and some pictures are below.
Here is some back story…
I purchased a MGPTS tent, 18’x36′. Nice, big, roomy – the castle of tents I am sure. William and I set it up while a thunderstorm to find near the end of the construction we were missing a Y pole. Nice – we had to make the drive back to Midlothian to get it. Once we returned, our tent was holding water on top and made 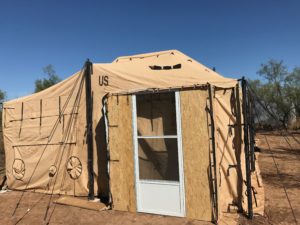 it a bit difficult to stand. None the less we got it.
Now, the entire time we were setting it up, I was saying “we can’t round corners – this thing is engineered to be setup the way it is to withstand the weather…blaa…”
With those type statements, I then had a bright idea of using cheap Chinese carabiners to secure the guy lines to the the anchors. Yes, you might have guessed, it was not engineered to use the cheap Chinese carabiners.
Jayton experienced 70 mph winds in town a couple nights before we arrived for the Hunter’s Appreciation Dinner. We did not know that until we got to the dinner. I was anxious to see how the tent faired. We arrived a camp a little after dark to find the tent was down. I was mad. I just knew it would be damaged beyond repair. We slept in the truck that night.
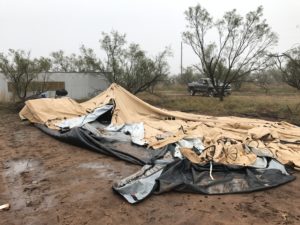 The next morning we assessed the damage. It was clear the failure was the carabiners. They were pulled straight as an arrow, and when they finally failed it caused damage. I am sure the tent would have made it through if it had been setup as designed.
So, after some coaching from the guys, I decided I would order a hand sewing kit for boat sails. Eric and I went to camp and moved the tent to a new location near our water well and utility power. Made the repairs, and set the tent up. We 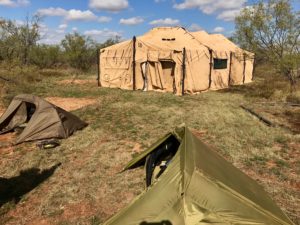 had to stay in our “coffins” one more time. They are still the best one man tent I have stayed in.
We decided to leave the tent floor out of it for now. We will just use the dirt for this season. We have plans to build a wood floor anyway, which will make things much nicer.
The heat sources we were using have proven not to be efficient either in cost or heat. The propane, kerosene, and diesel are causing the tent to sweat a little. The military diesel heater goes through about 5 gallons of diesel in 7-8 hours on the lowest setting. The kerosene heaters are nice radiant heaters, but I think they are contributing to the sweat, and kerosene is about $45 per 5 gallons. Neither on the settings we ran them would keep the tent warm all night. Again, just not efficient.
I decided we needed a wood stove to produce dry heat. Our camp is in the middle of about 100 acres of thick mesquite. With that, and the ‘leftover’ lumber William has from jobs – we will be good on fuel. So, we set out to investigate this idea. Stoves were expensive, or if affordable – too small for the job. OK – we’ll build one!
…and that is the back story.
Here are a few pics.
Only thing to add is, yes we’ve seen plenty of deer. We have decided to let them all walk to this point. I feel that will all change soon. William and I will be going down for about 4-5 days after Christmas – with a nice new wood stove.
Merry Christmas!


